Serialized Items
Create Serialized Items
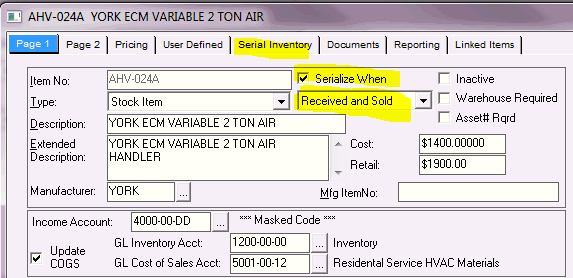
- Create your new Serialized item as you would a regular stock item
- Check the Serialize checkbox to expose the "Serialize When" dropdown
- Choose when you want ServMan serialize the item; both when Received and Sold or only when Sold
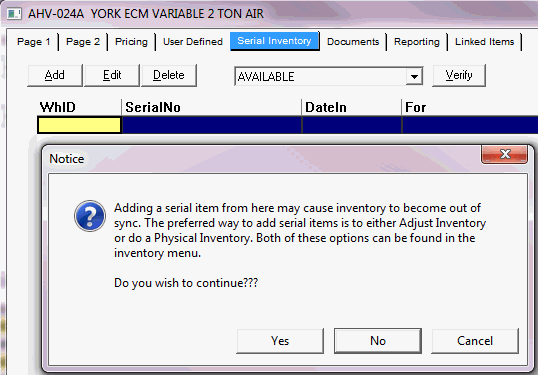
- Notice a new tab has appeared - this is where you will manage your serial numbers
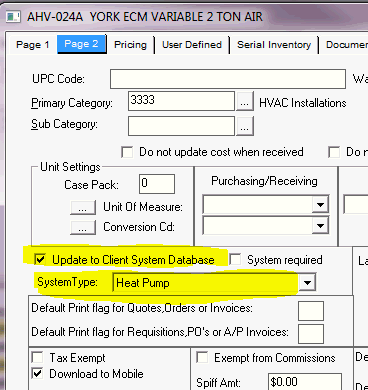
- On Page 2 of the item setup, check the Update to Client System Database and select the system type from the dropdown.
back to top
Receive Serialized Inventory
- If you have chosen to serialize these items both when Received and Sold, a new popup box will appear when receiving items into inventory
- Enter each serial number for the items you received and press Enter
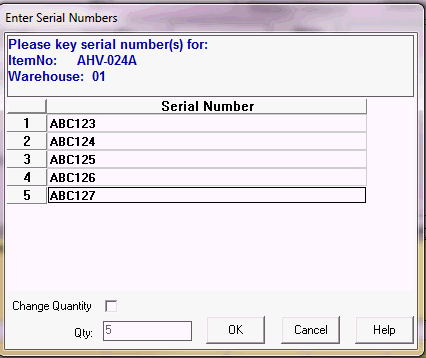
- Notice the serial numbers are now added to the Serial Tab

back to top
Transfer Serial Items
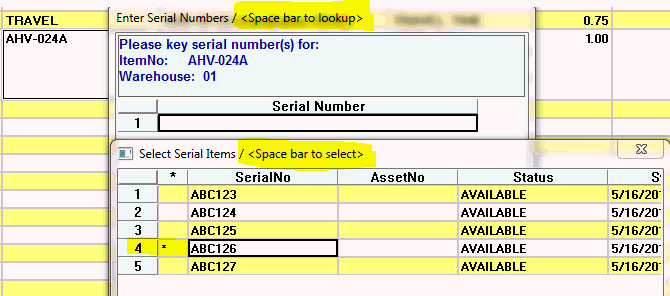
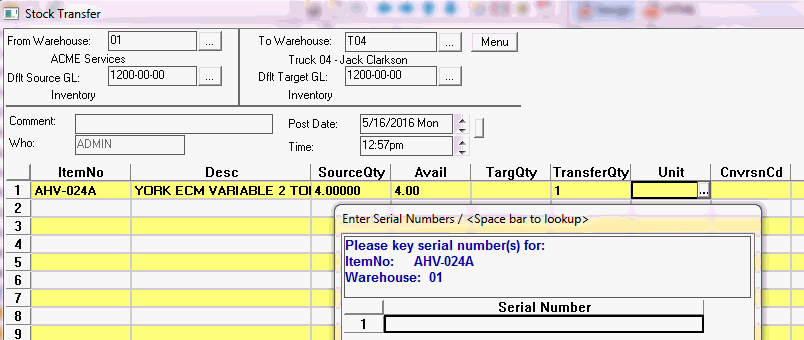
- To transfer a serial item to a tech's truck, simply do a stock transfer. When you enter the item number and quantity, the Enter Serial Number box will pop.
- Press the Space Bar to display a list of all available serial numbers,highlight the proper serial number for this order and press the spacebar to select that serial number. An asterisk will appear to let you verify you have selected the proper number.
back to top
Selling a Serialized item
- Adding an serial item to an order
- Create the order, add the item number and quantity sold.
- Right click and choose Select Serial Numbers
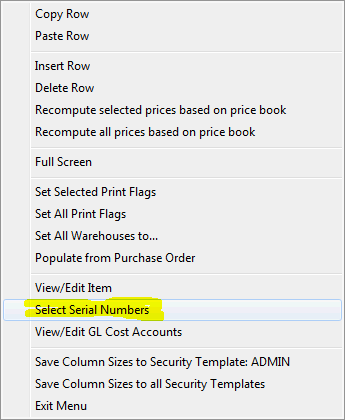
- Press the Space Bar to display a list of all available serial numbers
- Highlight the proper serial number for this order
- Press the spacebar to select that serial number - An asterisk will appear to verify you have selected the proper number.

- Press OK and the serial number will be added.
- When you view the item, you will see only the available serial numbers in the Available dropdown and the reserved items in the Reserved dropdown.

- NOTE: If you think the items are out of sync, press the Verify button and ServMan will review orders and make any corrections if necessary.
- Invoice the order as usual and update it to AR to see the item move from Reserved to Sold.

- NOTE: When an item is sold on the detail line of the order, a serial number must be entered when adding the item to systems on the order or you will not be able to invoice this order.
- Once the invoice has been updated to AR, the item will appear on the Client's System tab - if you have the checkbox checked to do so on the item master.

back to top
Finding Serialized Items
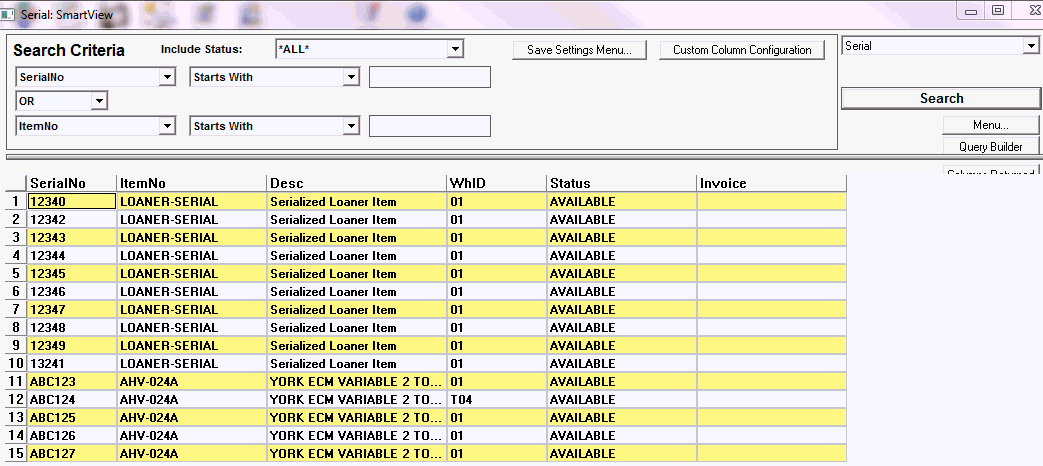
Search by Serial number or item number from the Serial SmartView found by clicking the Serial Inventory button on the Inventory Navigator
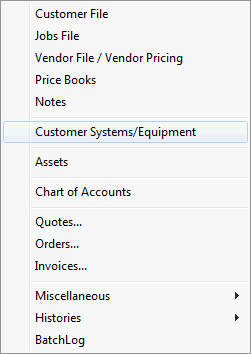
Search by Client Account or Serial Number from the System SmartView found under Master Files
back to top
Stock Transfers
When your warehouse guys move serialized items to a tech's truck, once they enter a Transfer Quantity, the Enter Serial Numbers box will pop. Select the proper serial number by pressing the spacebar as shown above.
back to top
To change an existing inventory item with quantities on hand to be serialized
Know what serial numbers belong to the inventory on each truck by doing a Physical Inventory Count
Adjust your count down to zero for this item, then add the item back into each truck with the Serial Number following the steps outlined here.
OR
Use the Adjust Inventory button from the Inventory Navigator
OR
In the item master, adjust the quantity of the item in each warehouse down to zero, print and press update
Add the quantity back in the inventory to the same warehouse to get the Enter Serial Number popup box.
- Press the Space Bar to display a list of all available serial numbers,highlight the proper serial number for this order and press the spacebar to select that serial number.
- An asterisk will appear to let you verify you have selected the proper number.
back to top
Fixing an incorrect Serial Number on an order
- If you have added an incorrect serial number, you may remove the incorrect serial number by checking the Change Quantity Checkbox and changing the quantity to 0
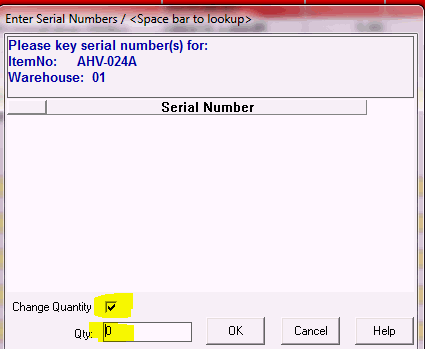
- Press OK and the quantity on the order changes to 0
- Change the order quantity back to 1 and select the correct serial number by following the same process as above.
back to top


