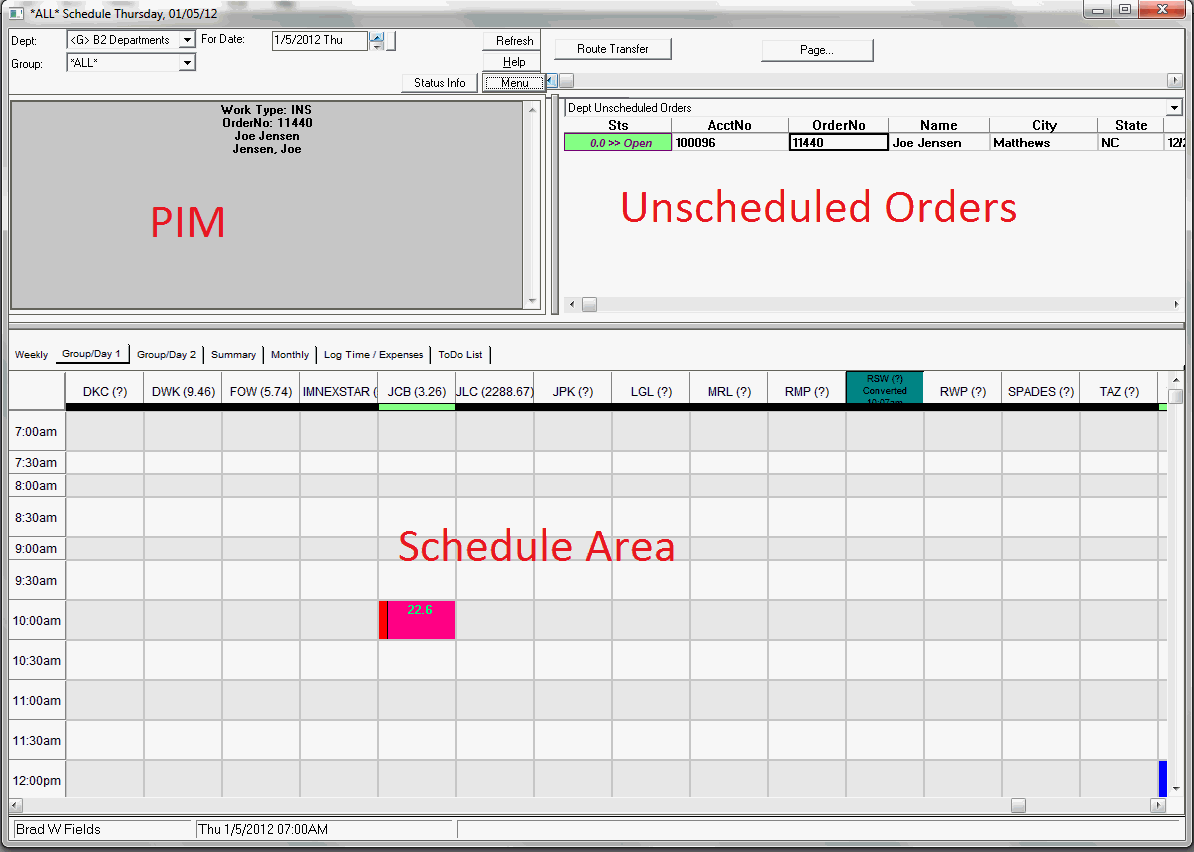
The concept of the Dispatch board is to provide a tool from which users can quickly and easily assign quotes, orders and appointments to an employee. In most businesses a user is responsible for monitoring and actioning these request based on department. For example if you have a larger enterprise you may have several dispatchers, perhaps several per branch. When request, (quotes and orders) are entered into the system they are assigned to a department that will be responsible for dealing with it. The dispatchers will likewise be assigned to monitoring new request based on this departmental assignment. To this end the software is designed to allow a user to select which department or group of departments they wish to monitor. The board will remember their settings so each time they open the screen it will open to their view.
Unscheduled orders for the selected departments are then viewable in the Unscheduled section of the dispatch board. An order is displayed here if it has not been placed on the dispatch board. Orders can be dragged from the schedule area to the unscheduled area for future scheduling. This is the "holding area" for a dispatcher to place request prior to scheduling. The columns that are displayed in this area can be modified to suit your specific work flow. Each column allows the orders in this section to be sorted by simply clicking on the header of the column.
A user can additionally "drill down" on the data in any field of any column in this area. For example, if their are many orders in your unscheduled queue, usually PM orders, and your looking for work in a particular zip code, simply sort by the zip code field then double click on the zip your looking for. Only calls that match the zip code you've selected will be displayed.
Orders are then dragged from the unscheduled area to the dispatch board for the employee and time slot desired. The system will display which employees have the skill to perform the work, as well as its proximity to their starting address as well as other calls already on their schedule.
Once scheduled orders are managed by setting status codes to depict activity against them. If using ServMan Mobile, the orders are synchronized to the technicians device where they can detail the tickets, set time required to complete the work and ultimately take payments and complete the request with the client.
The calls stay on the schedule forever, providing a clear history for your employees as to what they have completed. Orders can be assigned to any number of employees, and any number of days and the schedule will allow you to view that specific employees status as well as the global status of the ticket.
To display the schedule board, click the schedule icon in the icon bar. You can also click Schedule on the Sales Navigator or select Schedule > Scheduled View.
Scheduling your employee’s work and appointments has never been easier. Nearly everything revolves around the Dispatch Board, which is highly intuitive and easy to use. The Schedule Board has three sections called the “Dispatch Section”, the “Unscheduled Order Section” and the “PIM Section” (Primary Information Monitor). Each of these is covered below.

The “Dispatch Section” is the largest section displayed in the illustration’s above at the bottom. This view displays the employee IDs down the side or optionally across the top and time slots optionally on a vertical or horizontal axis. The colored blocks represent orders assigned to the respective workers. This is the Group/Day1 view. The Group filter in the upper left corner controls which employees are displayed in this view. Workers can be members of any number of groups as denoted on their employee record. Whatever Group you have selected in the upper left Group field will be the employees you are currently monitoring.
There are many other views available in the Dispatch Section represented by the tabs above the employee IDs, including “Weekly”, “Group/Day2”, “Summary”, “Log Time/Expenses” and “To Do List”. These views are described in detail later in this document.
The unscheduled section shows all unscheduled work orders or quotes that haven't been closed nor cancelled. The only exception to this would be if the order’s status prevents it from being displayed. (Status codes can be configured to not be displayed on the dispatch board!) For example, you may not want orders with a PartNeeded status to be displayed on the board since scheduling could cause a technician to be dispatched before the parts are ready. This section is filtered based on two fields, the department selection in the Dept. drop down in the upper left corner of the screen, and the order type selector directly above the order listing, currently set to "Dept unscheduled orders" for our screen. Regardless, orders are always limited by the Department selected in the upper left hand corner of the screen. The system allows you to monitor unscheduled orders for any one or group of departments. Department Groups are created under TASK->System Config->Department Groups.
Concept: Dispatchers select the Departments and Groups of employees they are responsible for monitoring. The board remembers a users settings.
The PIM (Primary Information Monitor) section is in the lower left-hand corner of this window. When you mouse click on any scheduled or unscheduled item in the other two windows, a brief review of the Order appears. The information to be displayed is user defined at the system level, but normally shows the company, contact, phone number and a brief service request description. Any other information can be easily added such as 30/60/90 day accounts receivables or map coordinates by modifying the screens settings. This is accessed by right clicking in the PIM window and enabling Design Mode.
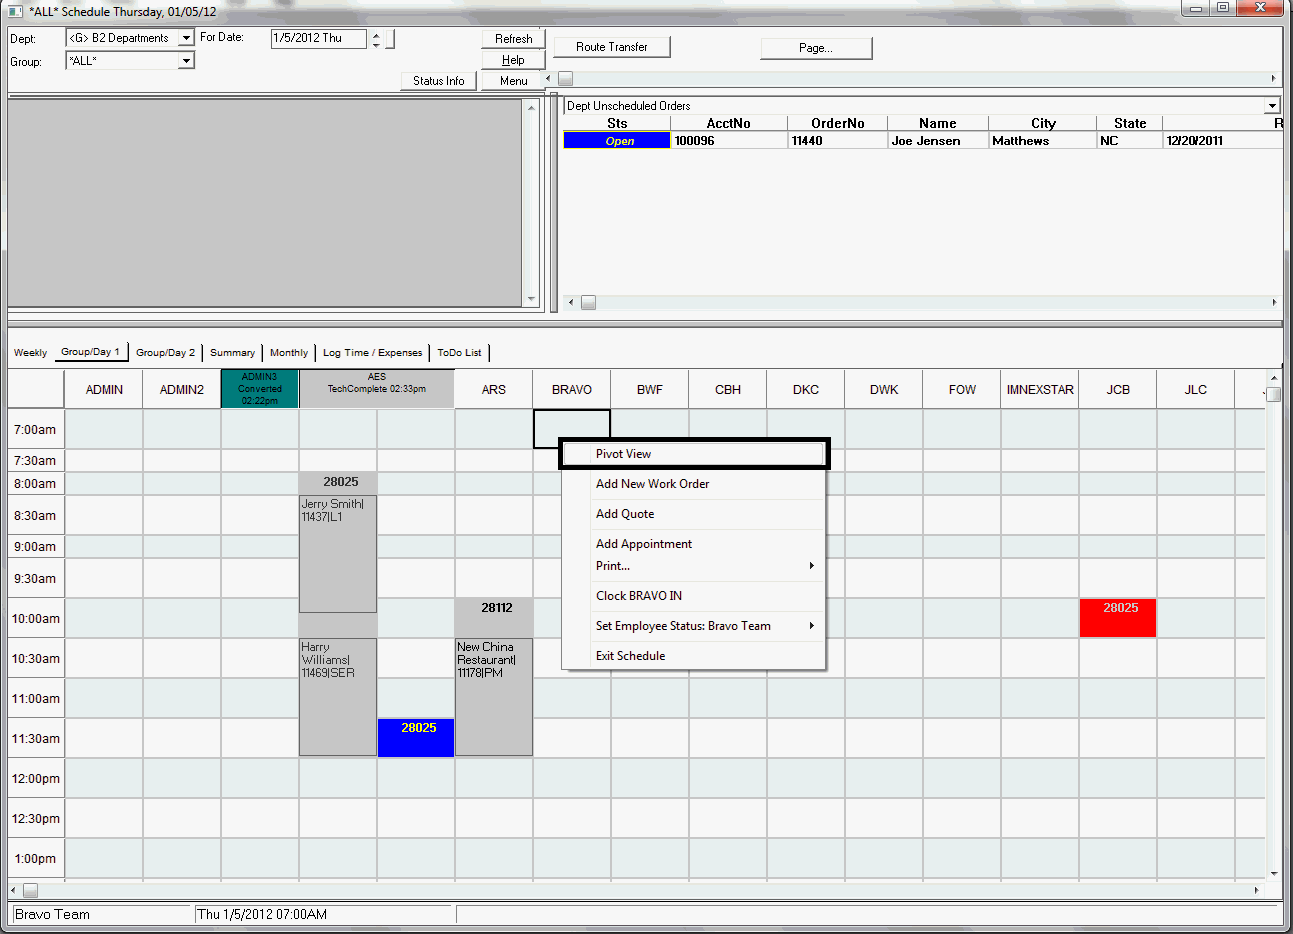
Allows you to Rotate the Scheduling area. Right click the dispatch area and choose Pivot View. This option will rotate the Schedule area from employees on the side to employees on the top. The system will "remember" your settings the next time you open the scheduler.
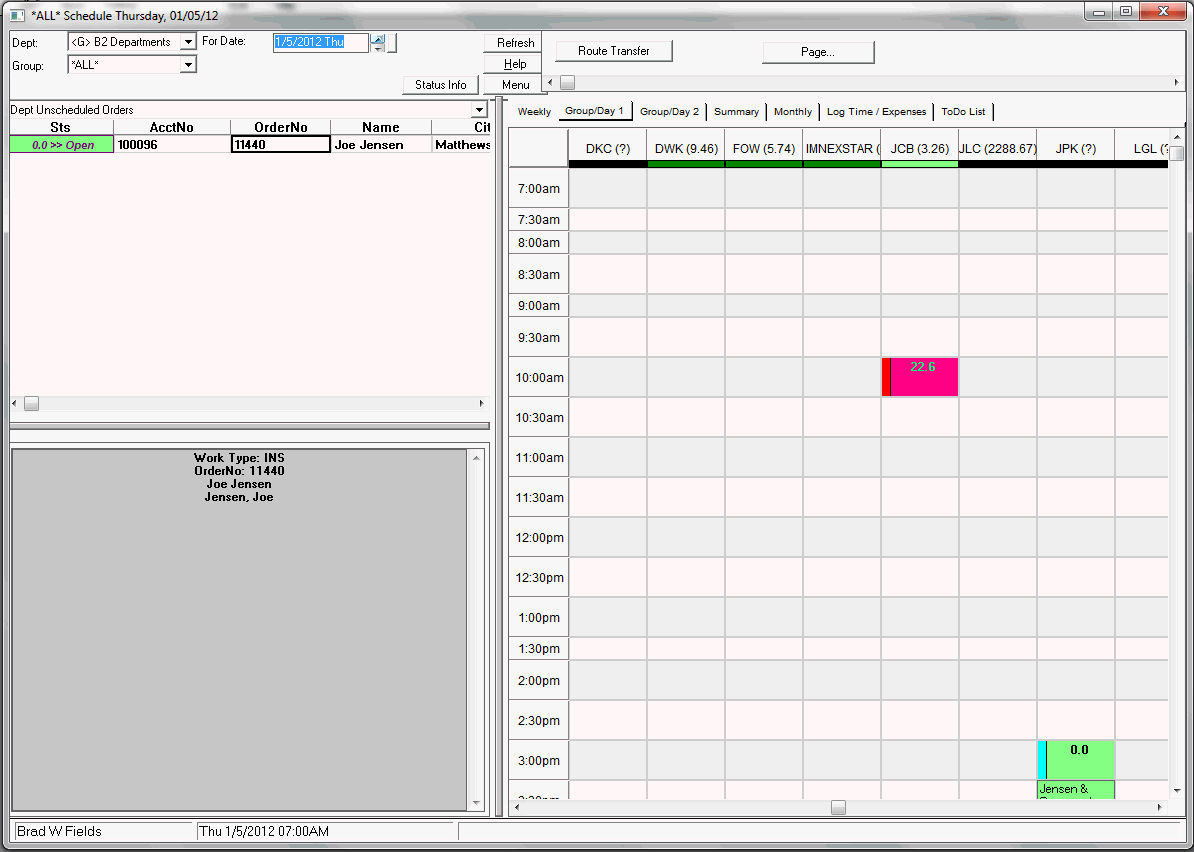
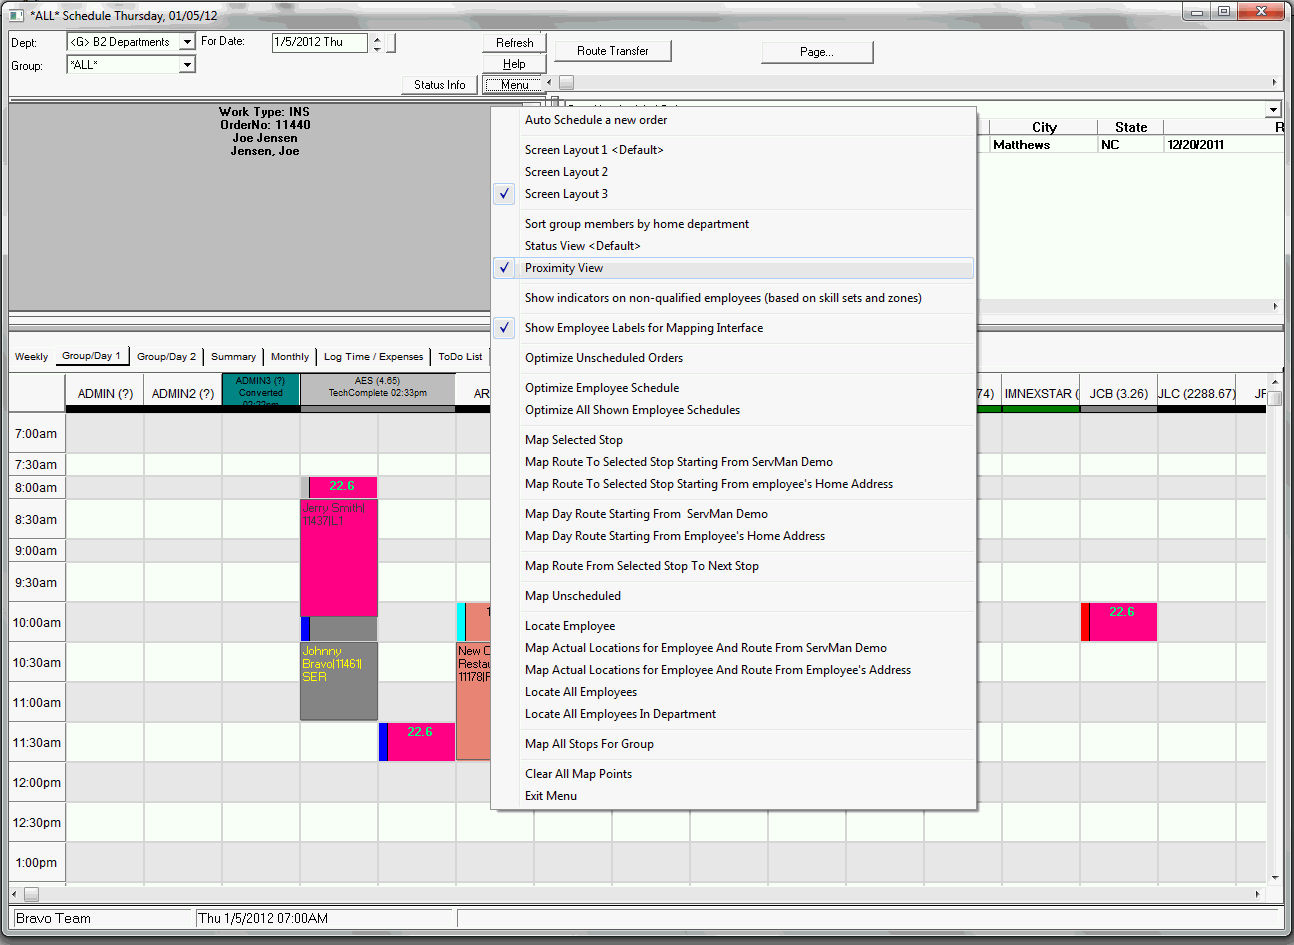
The ServMan schedule board has several built-in screen view options that are user selectable. Clicking the menu button at the top of the screen allows you to select the view you prefer.
Each are described below.
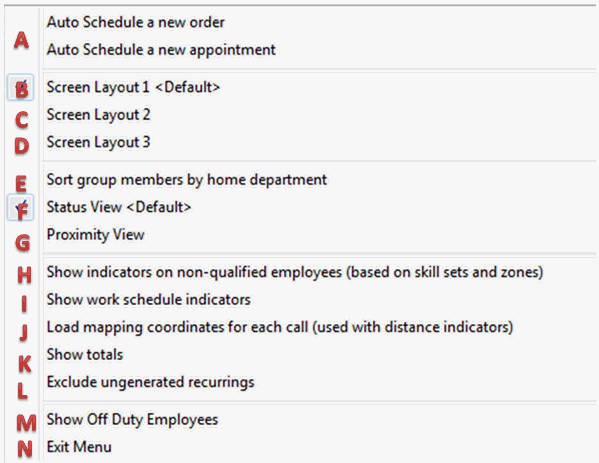
Auto Scheduling is covered in the Auto-Schedule section. Click here to read more about it.
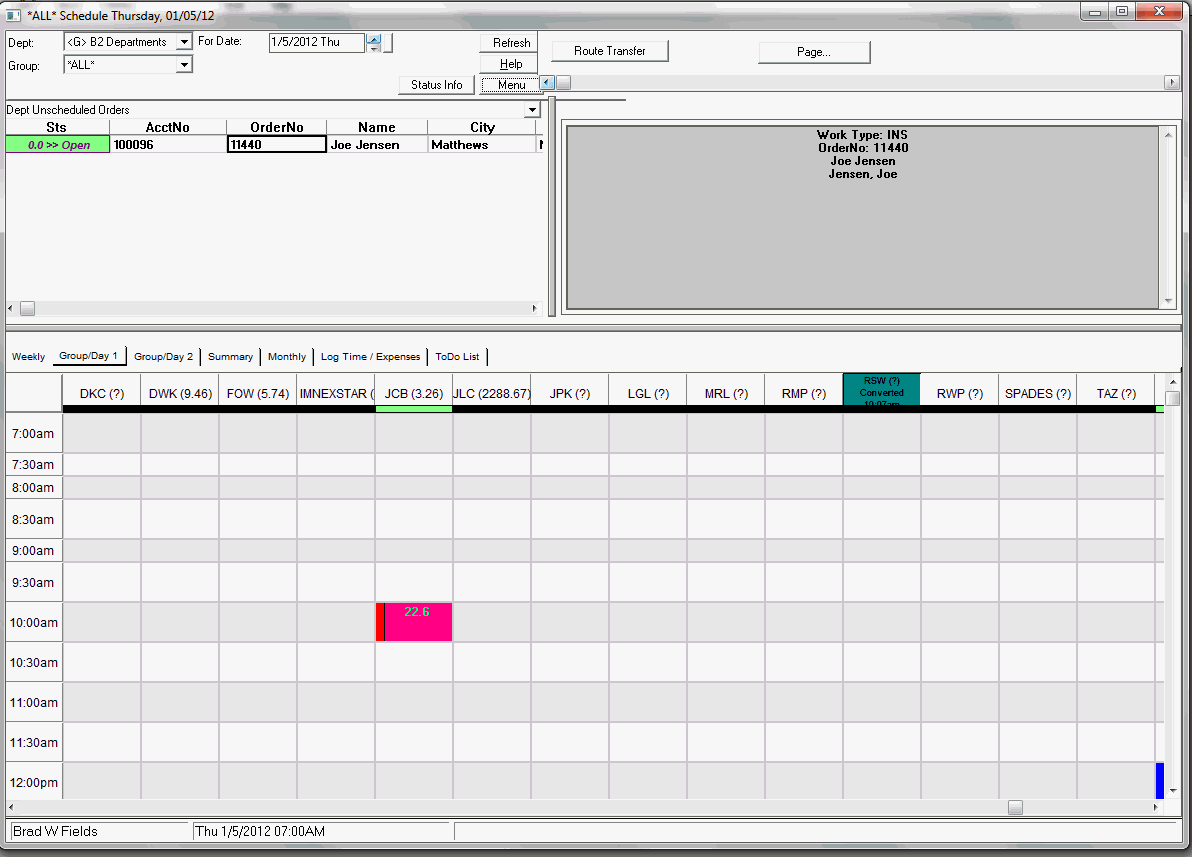
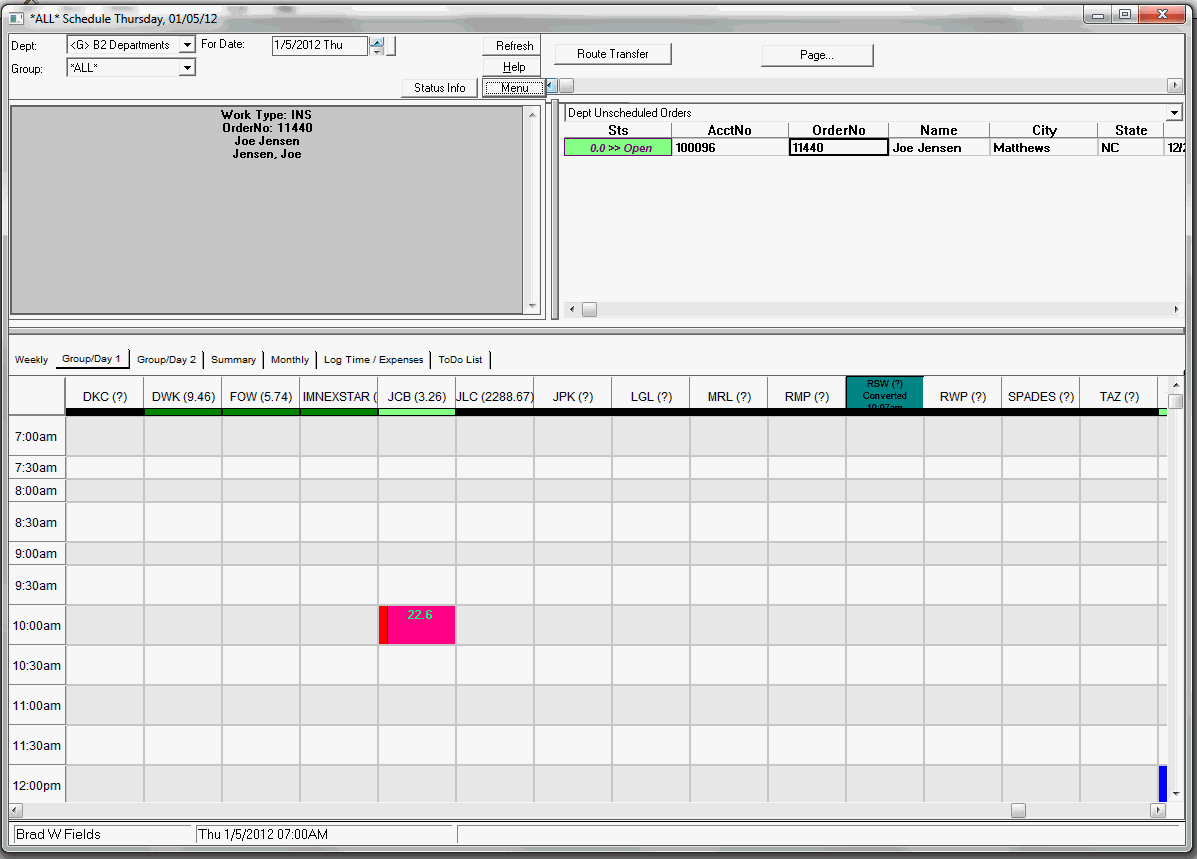
This option sorts your employees on the dispatch board based on the Employee's Home Department assignment.
ServMan allows you to view scheduled orders either by Status View or Proximity View. Status view will show each order in the color corresponding to the status the order is in. The employee's column/row header will reflect the last status change and time. For more information, click here.

Proximity View instantly displays the distance of all scheduled and unscheduled orders on the dispatch board relative to whichever order or technician you click. This option is activated by selecting “Proximity View” from the menu button on the schedule board.
NOTE: ServMan’s Proximity View requires latitude/longitude coordinates for your client locations.
This data can be obtained and added to the client records seamlessly through Avalara’s address verification service (AVS) which is integrated with ServMan.
First, looking at the image below, color codes appear on all orders and technicians depicting the distance range from the currently selected ticket or technician (i.e. Green might represent tickets within 5 miles of the selected order, Orange 25 miles, etc.).
Second, the Actual Distance in Miles from the selected ticket and technician is displayed on all other orders in both the scheduled and unscheduled windows. In the screen shot, the dispatcher has selected AES’s 8:30 AM order. All other orders now display the color-coded range and actual mileage proximity to that ticket. Note that employee BWF does not have the skills to work on the selected order, so his name is “X’d out” alerting the dispatcher not to assign it to him. This feature is activated by selecting “Show indicators on non-qualified employees (based on skill sets)” from the menu button on the schedule board. Unscheduled orders also display the order status name next to the mileage, while the scheduled orders display a color-chip in the left corner to indicate the current order statuses to the dispatcher
The Actual Distance in Miles from the selected ticket and technician is displayed on all other orders in both the scheduled and unscheduled windows. Using this view, the order status is still displayed. Unscheduled orders display the order status name next to the mileage, while the scheduled orders display a color-chip in the left corner to indicate the current order statuses to the dispatcher.
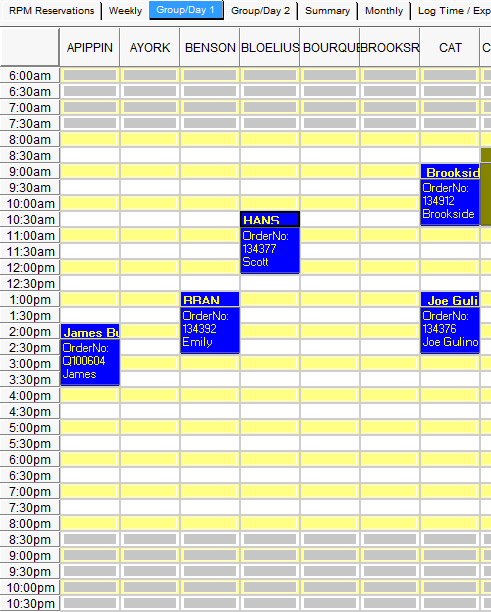
If you have set up work schedules on your employee records, when you have "Show work schedule indicators" checked, any hours/days the employee does not work, will be indicated by a gray box in those time slots as shown below from 6 - 7:30 AM and 8:30 to 10:30 PM.
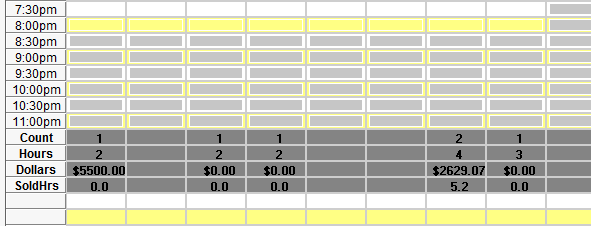
If this option is checked, the total number of calls, hours worked (or scheduled), dollar amount and, if you are a Nexstar client, Sold Hours, will appear at the bottom of each tech's schedule.
This option removes all ungenerated recurring orders from the schedule board. This is useful, as it is time consuming to do all the calculations required to show the ungenerated recurrings.
Off duty employees will appear on your schedule board will all time slots grayed out.
Exits the menu.
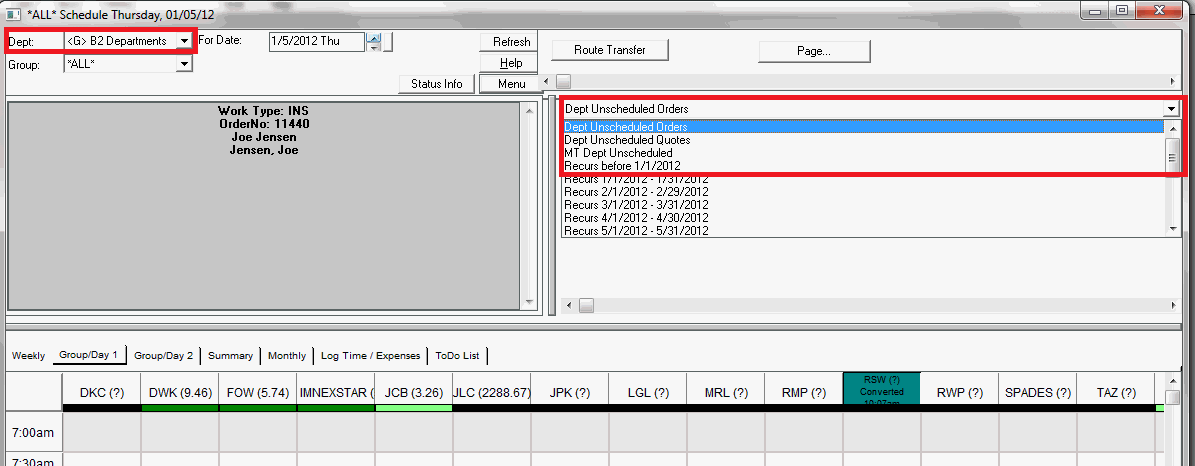
Make sure the department is properly set in the Department Selector for the orders you are searching for.
Make sure the order type filter is properly set at the top of the screen. Options are as follows:
|
Unscheduled View Option |
Description |
|
Dept Unscheduled Orders |
Displays all unscheduled orders for the selected department or group of departments. |
|
Dept Unscheduled Quotes |
Displays all unscheduled quotes for the selected department or group of departments. |
|
MT Dept UnScheduled |
Displays all unscheduled Maintenance Tasking orders for the selected department or group of departments. |
|
Recurs before xx/xx/xxxx |
Displays all recurring orders that have not been generated prior to the date selected based on the NEXT date on the recurring order template. Only one instance of a recurring order will be displayed at a time. (If an order occurs 4 times a month, only the first instance will be displayed until it has been created, then the Next, then the Next, etc... |
Orders are displayed with the most recently added orders at the top of the list.
Sort your view by any column and locate the ticket to be scheduled or right click and choose FIND. When using the Find option it will search based on the currently selected column.
Locate and select the Quote or Order in the Unscheduled Section and single click the order to select it.
Locate the employee and time slot you wish to schedule the request to.
Right Click on the Selected order and choose "Drop on Schedule"
Click and drag the order into the desired time slot/employee
Schedule the first Employee using the Dispatch Board
Right Click the order on the Dispatch Board and choose Edit Order
Select the Schedule tab and add the new employee manually to the Schedule tab.
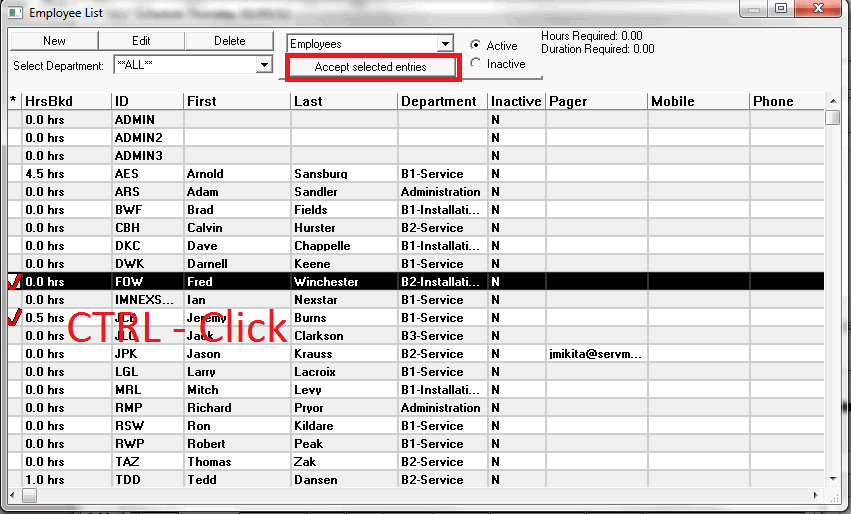
Select the Picker button to the right of the current schedule entry. (Highlighed in red below)
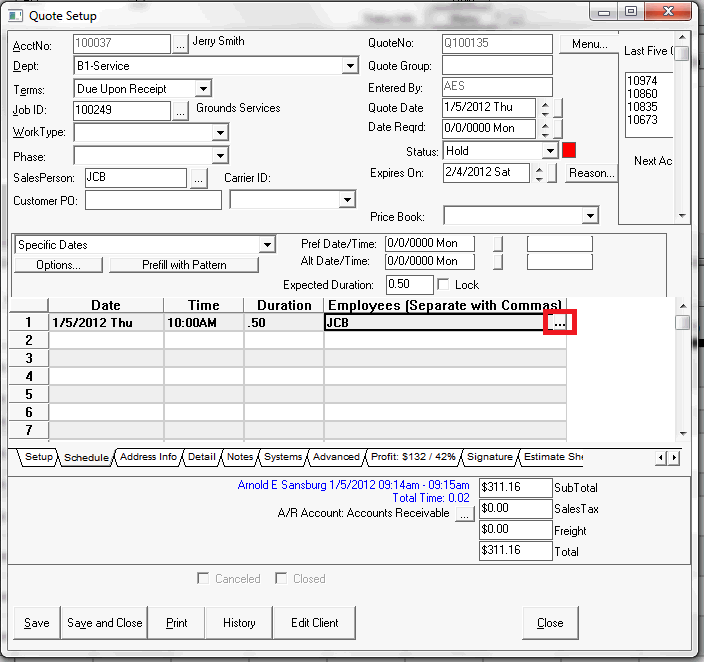
The existing scheduled employee will already be displayed as selected. Using CTRL-Click you may select any number of additional employees for the ticket.
Choose "Accept selected entries" and save the order to exit.
The order will now be displayed for all Scheduled Technicians.
Edit the Order and Select the Schedule tab as described above.
Manually set the date, time and duration for the entry then using the Picker button select your employee\employees for the assignment.
Manually assigned the dates using the method described above.
Right Click on the first cell of the Order in the Schedule area and choose "Set Order Status"
Clicking on the first cell of an Order in the Schedule area, click and drag the order to the Unscheduled Area
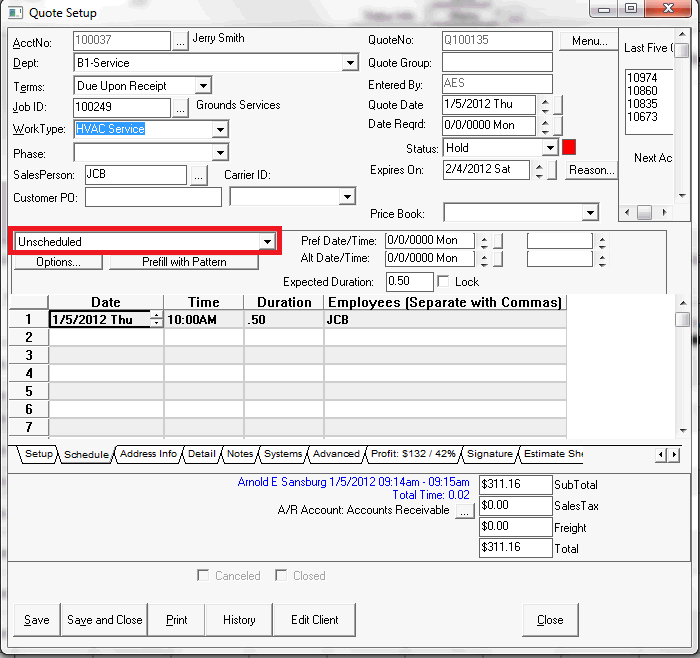
Edit the order and select the Schedule tab
Choose - "Unscheduled" from the drop down list, highlighted in Red below.
The software provides a feature that displays the LAST status attributed to an employee for any given day. This is displayed on the row/column header for the Employee ID on the schedule board as displayed below.
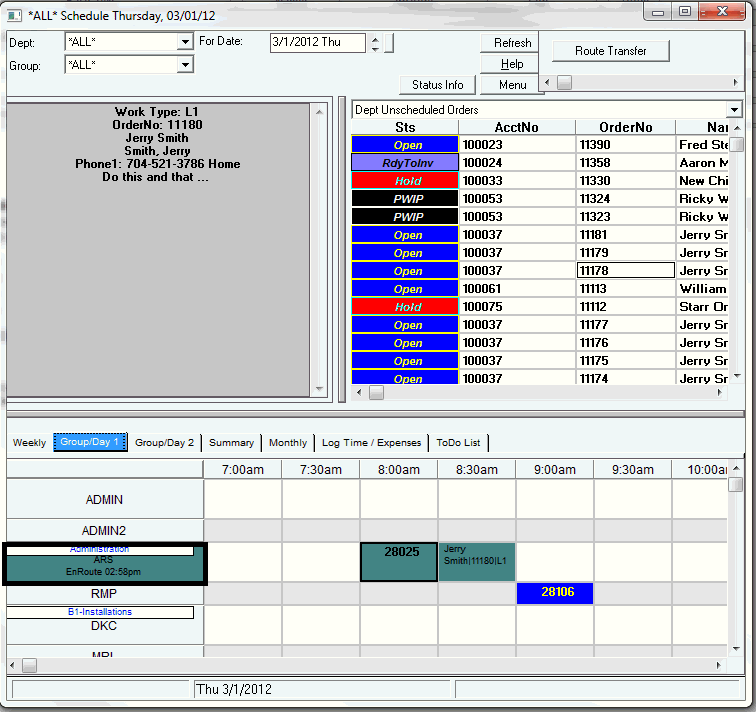
When a status is set using a TECHNICIAN BASED Status code it will update the display for the technician listed in the WHO entry on the status history. In other words, if your dispatcher sets the order to ENROUTE for your technician Rick, Rick's last status will display as ENROUTE.
Now, if a Parts Manager sets a status to "PARTREADY", and this status is NOT a technician status, the WHO will use the user name that set the status, in this case the Parts Manager. This will set the Part's manager's last status to say "PARTREADY" as representing the last status set by them. This status will be displayed even though the order is not scheduled to them.
You can manually force an employees last status by right clicking on the employee and day and selecting Set Employee Status. Employee Status codes are configured under Masterfiles-Misc-Employee Status Codes.
Clicking the Weekly Tab on the dispatch board, will allow you to see everything scheduled for a tech over a 2 week period.
