|
What's covered? Hide |
The software includes the ability to create basic question sets that can be linked to orders, quotes, clients, jobs or invoices allowing you to perform surveys and happy calls for completed work or other purposes. Using this optional module you are able to create any number of question sets, called surveys, and then launch them from specially configured SmartViews.
Once a survey is completed you can optionally send an email of the survey results to anyone you wish using standard messaging tools. The concept of sending the survey results was originally conceived as a means of instantly notifying team leaders or management when receiving actionable survey results, typically negative.
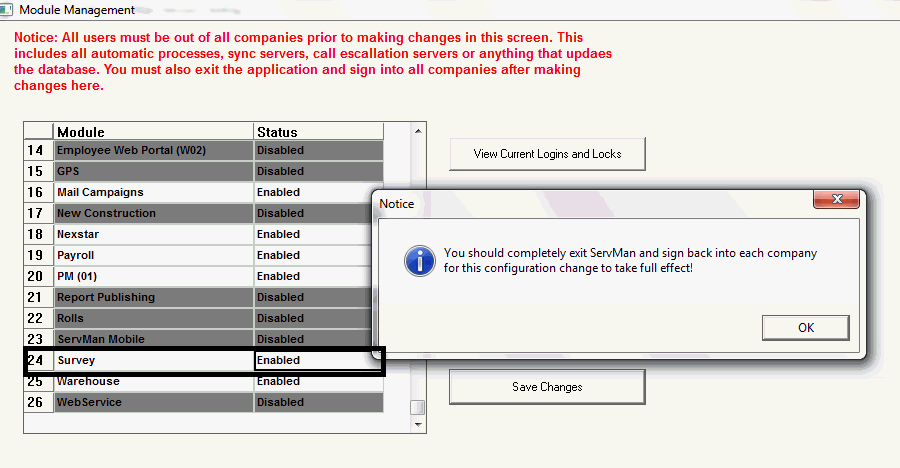
You will need to first enable the module, then create your question sets prior to using the tool. This tool is early in it's development and provided as a courtesy. At the time of this document, the module only included a single specially configured SmartView for orders, named - "Needs Survey", installation and configuration of additional custom SmartViews is typically billable if performed by ServMan personnel. It is not uncommon to desire custom reporting and other automation based on survey results. These services would be billable and not covered under your standard support agreement.
The survey module adds additional tables and fields to your ServMan installation to store your survey information and results. Because of this, all users must exit ServMan while the module is enabled. NOTE: The survey module is only available in ServMan 5.0 release A. 85 or later.


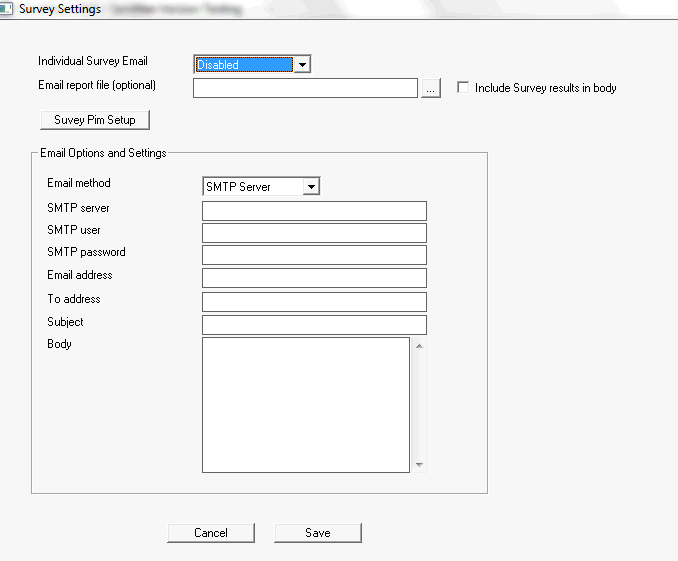
Once installed you should have a new Navigator installed to your system called Surveys. From this navigator, choose Settings to access the above form. Complete the above information if you'd like the system to have a default user or report format optionally emailed upon completion of a survey.
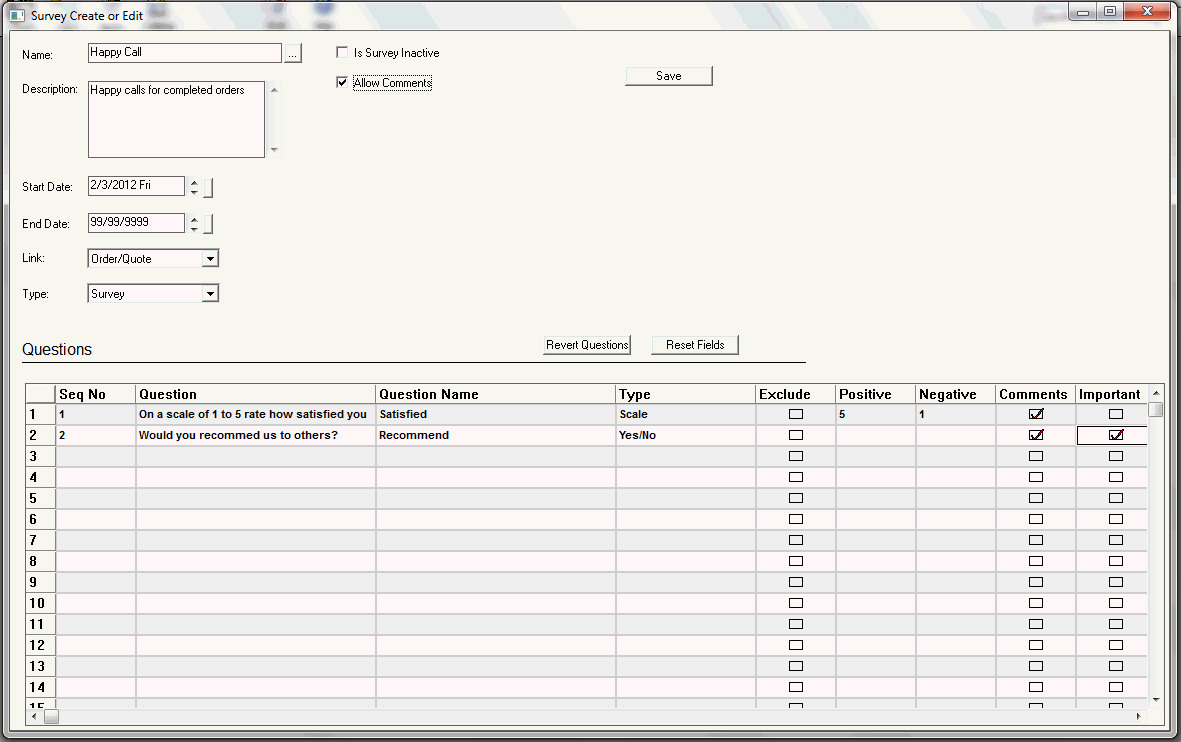
Once the module is enabled you will need to create your own survey. From the Survey Navigator choose Maintain Surveys to access the survey creation screen.

Name: Name for new survey (if editing, the picker button will return a list of existing surveys)
Description: Description for survey
Start/End Date: Date range that this survey should be available to be completed
Link: Defines which type of record the survey will be linked to. Order/Quote, Client, Job, Invoice
Type: Choose Survey, Polls are reserved for future use
Is Survey inactive: Check box to inactivate selected survey
Allow Comments: Check box to allow comments on questions
Seq No: Sets order questions appear in survey
Question: The question your users will ask the client.
Question Name: Name of the question. Provided as a label for reporting results.
Type: Type of question.
Exclude: Exclude this question from survey
Positive: Yes/True - Assigns a positive point value to a Yes/True answer, adding that value to the total survey 'score'.
Negative: No/False - Assigns a negative point value to a No/False answer, subtracting that value from the total survey 'score'.
Comments: Adds a box for comments for this specific question. If the ALLOW COMMENTS check box is checked at the top of the form, the user will be able to check overall comments at the end of the survey.
Important: Adds a check box to the survey question “Is this question important?”
Example of how Survey 'Score' is calculated:
If they answer "5, yes, true" then the 'Score' will be 5 + 10 + 5 = 20.
If they answer "3, yes, false" then the 'Score' will be 3 + 10 + (-5) = 8.
You can create and launch surveys from LC controls placed on orders, quotes, invoices or from SmartViews. You can launch the survey directly from the Survey Navigator. After completing a survey you can optionally e-mail the survey results to your team leaders for follow-up. You can additionally add LC controls to various other desired locations in the application such as orders, quotes, invoice, or the client screen. To add a custom control you would add an LC button and use the following line of code to launch the survey tool in the actions section of the control:
RunUserProcedure("Survey Perform");
If you are unfamiliar with using LC tools contact support for assistance.
At the time of this document the software includes a single SmartView for orders named "Needs Survey" that is specifically designed to allow you to locate orders completed within a specific range. A button has been added that allows the user to then launch a survey directly from the SmartView. If creating your own SmartViews you can use this as a example.
The survey module consists of several system procedures, a Navigator, a SmartView, and reports. In order for your users to access all these features, you must update their security settings to allow access to these features.