|
What's covered? Hide |
The issue of creating agreements with incomplete information during a data conversion are two fold. First, the user must be able to set Serviced Through Date, informing the software that orders prior to a specified date, service through, will NOT be generated. Second, if there is deferred revenue the user needs a way of telling the ServMan's Job Ledger the amount to be recognized for each agreement. For example, if you have a $200 agreement, you recognize revenue when the work is performed, and one visit has already been completed, ServMan needs a way to know that there is 1 visit remaining and we need to recognize $100.00 when we perform that visit. The following provides instructions for manually keying these agreements.
You will need to know the following to complete this process:
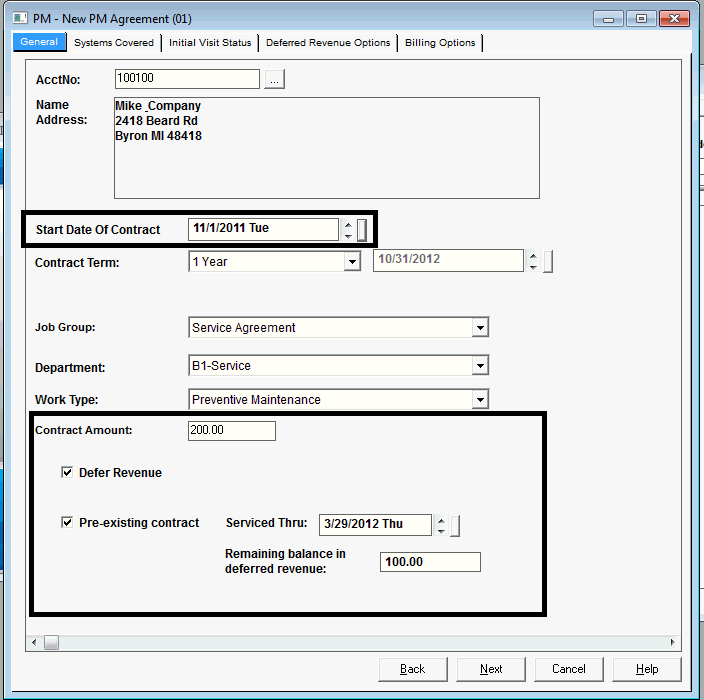
Step 1 - Launch the PM Wizard from the client record either from the client menu button or by right clicking on the client record from the Client SmartView. This will pull up the PM Setup Wizard below:

Complete the Serviced Thru date, most often this is the current date unless your company has created orders in advance for future months. Any orders regularly scheduled in the 1st day of months PRIOR to this date will NOT be generated by the system.
Key the remaining balance to be recognized for this agreement.
Click NEXT
STEP 2 - Assign your system coverage options (See Coverage Types for more information)

STEP 3 - If you have already performed a visit on this contract, prior to moving to ServMan, Select Yes, otherwise, select No and move to Step 4, if you defer revenue, or Step 5 if you do not.

STEP 4 - If you defer revenue, the Deferred Revenue Options tab will be available.
Initial Deferment Option:

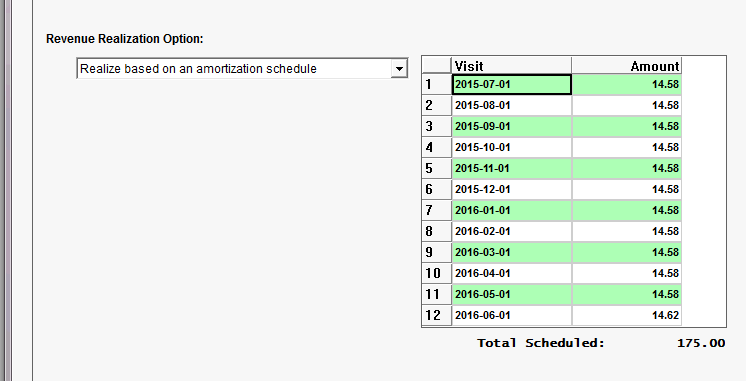
Revenue Realization Option:


STEP 5 - Select the proper Billing Options for this contract (See Billing Options here.)
Step 6 - To review the newly created contract, click Yes.

Note: There has been NO EFFECT TO INCOME OR BALANCE SHEET from this process. If we look at the Journal Entry created from this process below you will note that the system has simply assigned dollars from the EXISTING DEFERRED REVENUE ACCOUNT to this Job Number, creating an auditable Job Ledger and balance. This entry can be viewed from the Job screen by choosing the "View\Edit WIP COGS Journal Entries option from the Job Menu.

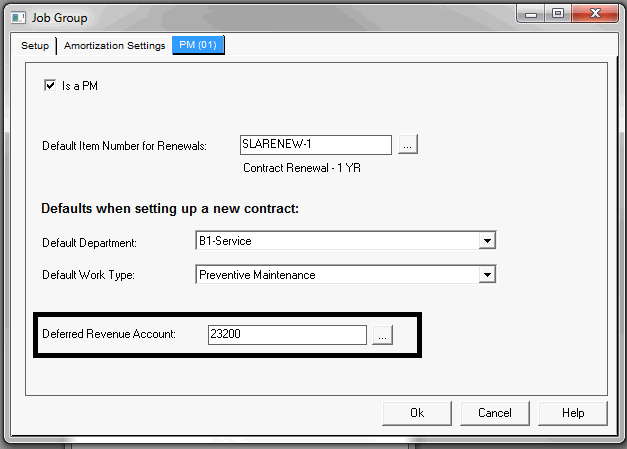
This is accomplished by creating a Journal Entry debiting/crediting the same account and applying the new Job ID to only the Credit side of the transaction. The account that is affected is determined based on the Job Group setup screen, PM tab as displayed below:
