|
What's covered? Hide |
To aid in setting up RPM for the first time, ServMan has created a Resource Planning Setup Wizard found on the bottom right corner of the Resource Planning Module navigator. Please take a moment to read through the RPM Overview and Process page located HERE. Reading through that information along with conversations with your ServMan project manager will assure you are setting up RPM for the most efficient way to schedule your techs.
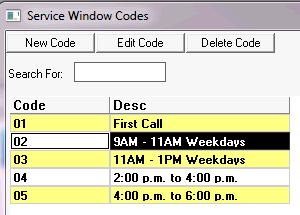
Service Windows are accessed from the Resource Planning Module's Service Window button located at the bottom right of the navigator or from MasterFiles->Misc->Service Windows.
Service Windows must be created prior to using the Resource Planning Setup Wizard
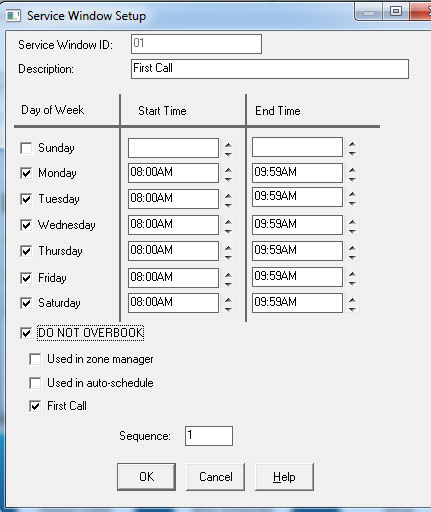
Create as many service windows as are required to cover all your work days, but remember that you should NOT have overlapping service windows in any one shift. If your organization initially allocates 2 hours per call, you would most likely configure each Service Window as a two hour block, each sequential. (To learn more about Service Windows with Auto-Schedule, click HERE.)
To create the Service Window, press the New Code button

Access the wizard by clicking Setup in the lower right hand corner of the Resource Planning Module
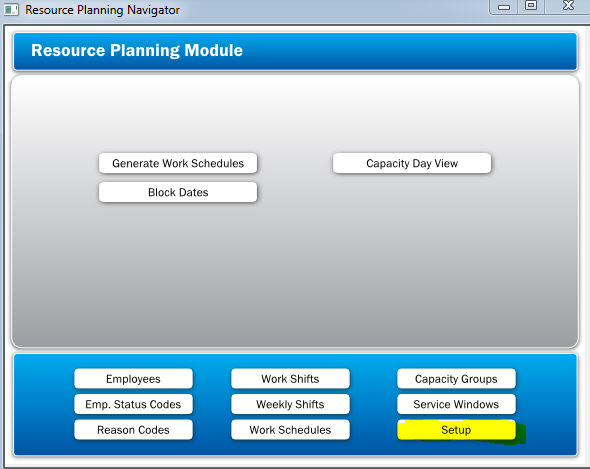
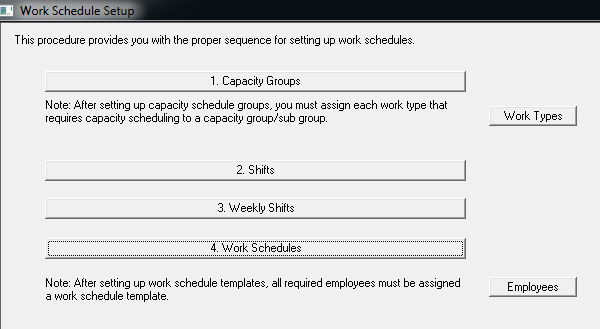
The setup wizard will walk you through each step of setting up this module
Press the 1. Capacity Groups button
Enter a Description for your Capacity Group - Create a Capacity Group for each trade and type of work your employees perform. Learn more about Capacity Groups HERE.

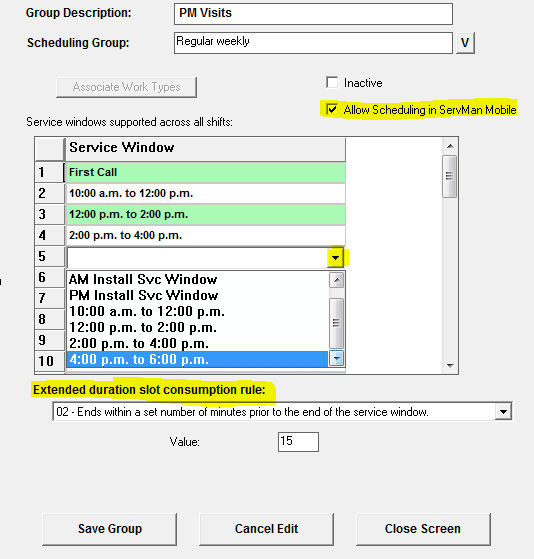
For example, if your company has 2 hour service windows and your calls generally take 2 hours to complete, select this 00 option.

If your service windows are 2 hours, and your calls generally take 1 hour, you can select 01-Comsumes as percentage of the Service Window and enter .50 in the value field.

02 - Ends within a set number of minutes prior to the end of the service window - This also requires a value be entered for the number of minutes prior
If your service windows are 2 hours, and your calls generally take 30 minutes, you can select 02-Ends within a set number of minutes prior to the end of the Service Window and enter 90 in the value field.

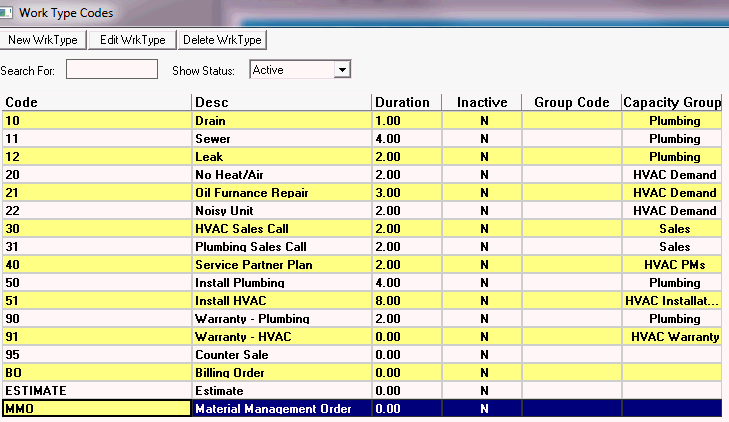
Click on the Work Types button in the Work Schedule Setup Wizard

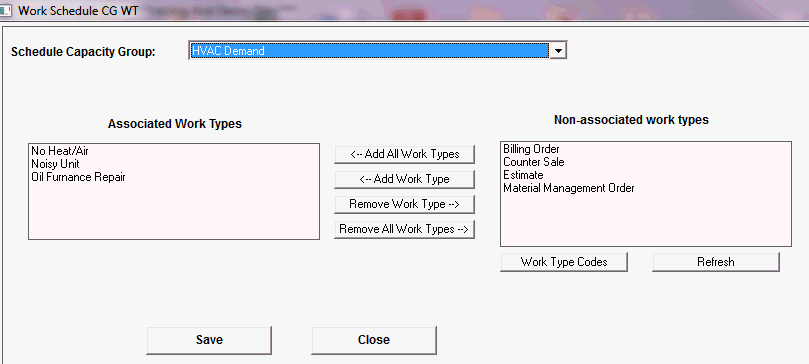
For every work type that you intend to use in a capacity group, select the proper Schedule Group and indicate how many time slots this work type will generally consume within that group.

Not all work types need to be assigned a capacity group.
Return to the Work Schedule Setup Wizard and once again click on the Capacity Groups button

To create your work shifts press 2. Shifts on the setup wizard
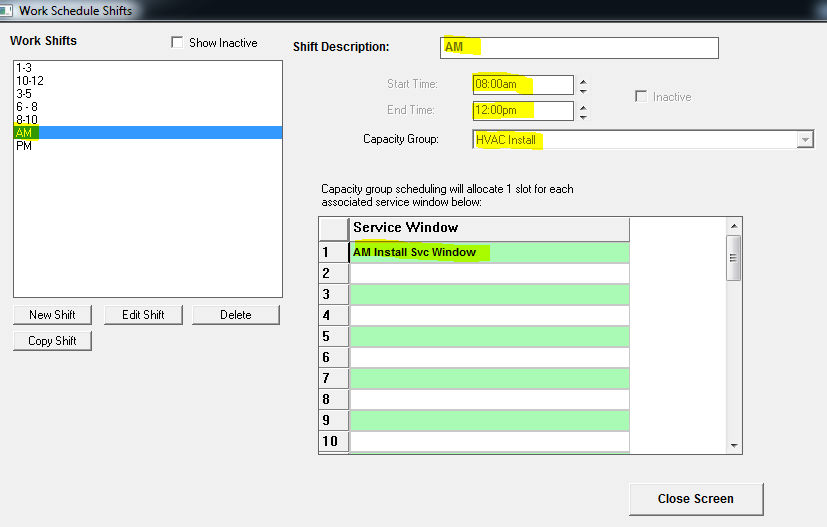
Shifts are defined only as a beginning time, ending time and specific service windows that are to be included in the shift. In the example below the HVAC Install department has one shift defined as being 4 hours long from 8 to noon. This shift uses one slot for the one AM Install Svc Window listed in the grid. If a technician is scheduled to work the AM shift, he will be working from 8AM to 12PM.
These work shifts are then combined to create a Weekly Shift that your technicians will be assigned to.
Week Shifts are used to define collections of shifts to create weekly shift patterns that will be assigned to Work Schedules. For example, if one Technician works Monday through Friday, 8AM to 5PM and is on call on Saturday, while another technician works 2PM to 10 PM each night and is on call on Sunday, they work different weekly shifts.
To create weekly shifts, click the 3. Weekly Shifts button on the setup wizard
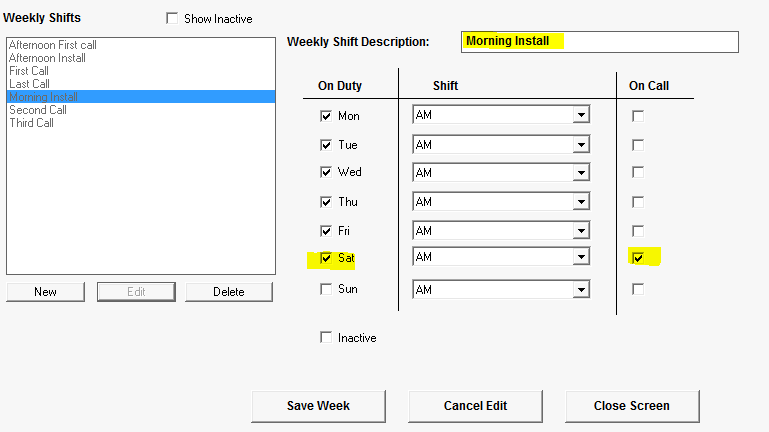
In the example below, techs assigned to the Morning Installation Weekly Shift will work the AM shift (8 - 12 as described above) Monday though Saturday and will be On Call Saturday after noon.
The Work Schedule feature of ServMan allows you to string together multiple Weekly Schedules to form complex patterns. Expanding on the example above, a tech assigned to the Morning Install Weekly Shift one week, can then be assigned to the Afternoon Install Weekly Shift the next resulting in a 2 week work schedule that will repeat based upon the settings in the Work Schedule.
To Create a work schedule, press 4. Work Schedules on the Setup Wizard
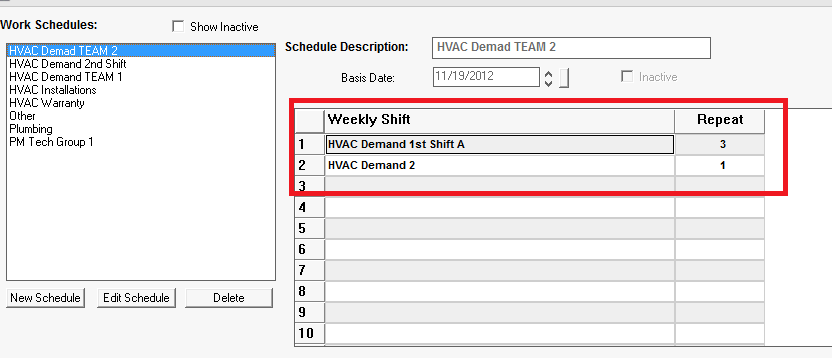
In the example below, Techs will first work the HVAC Demand 1st Shift A for three weeks, then the HVAC Demand 2 shift for one week, then repeat this pattern by working the HVAC Demand 1st Shift A for three more weeks, HVAC Demand 2 shift for one more week, etc.
Once work schedules are created, you must assign your technicians to their work schedules.
Click the Employees button on the Setup Wizard

On the Payroll Info tab of the employee record, select the appropriate Work Schedule from the drop down list for each technician

When completed, exit the Setup Wizard page.
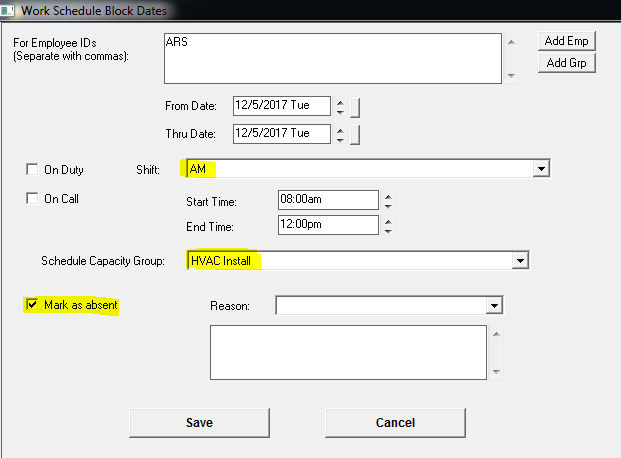
Use the Block Dates button to make "on the fly" changes to the Work Schedule. In the example below, employee ARS called in sick for his AM shift today. I add his employee ID to the top box, select the date(s) he will be out, and the Shift he will be missing. ServMan knows the capacity group his absence will affect and the times he will be out. Check the Mark as absent check box and if desired select a reason and enter an explanation in the box below.
If the tech has an appointment for a portion of his shift, you can choose the start and end time that he will not be available and when the schedule is generated capacity for that time period he will be out will be reduced.
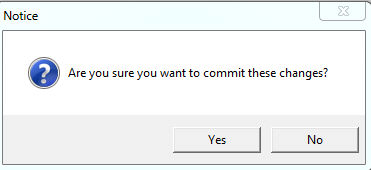
Press Save and Yes if you want the block him for the time entered.
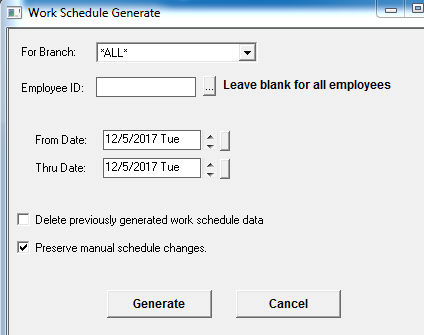
Press the Generate Work Schedules button on the Resource Planning Navigator. This will build the Capacity Scheduling grid and populate it with all possible employees that are on duty for that
Select the branch and time period you want to generate the work schedule for. This is usually done on a daily basis so that modifications based upon weather, illness, and other unforeseen things may be made prior to running the process.
ServMan allows you to delete previously generated schedules and regenerate without any adverse effects. If manually schedule items are already on the board schedule to techs, they can be preserved, even while deleting the generated ones.
Click HERE to see how to use Capacity Scheduling.
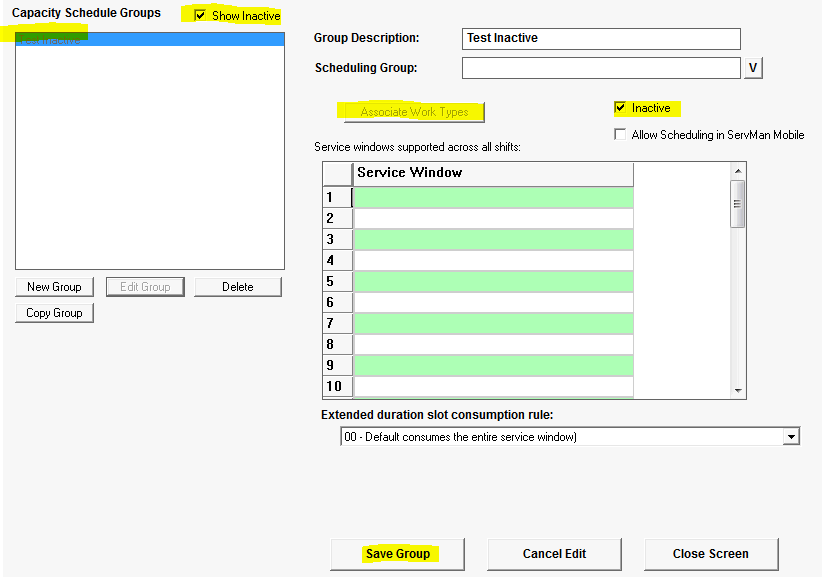
Select the Group you want to inactivate
To see this inactive group later, check the Show Inactive checkbox above the Groups grid.
