ServMan offers a sophisticated purchasing feature called Auto Purchase. Auto Purchase offers a number of options to help you streamline purchasing of stock inventory. This is done by creating multiple purchase orders (POs) based on maximum and minimum stocking quantities and quantities needed for open orders.
Click the "Auto Create PO" on the Purchasing Navigator.
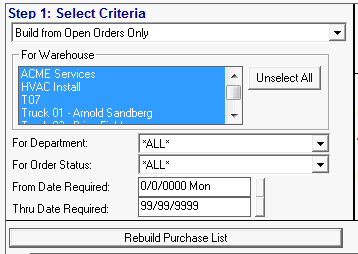
Step 1: Select Criteria
Select one of the following purchasing options:
Build from open orders only: Creates PO(s) for items on open orders where the quantity on hand is insufficient to fulfill the order. The quantity purchased is determined by the subtracting the Total Quantity on Hand from the Total Quantity needed for the orders.
Build from inventory max/min levels: Creates PO(s) for items where the inventory is below the minimum stocking level. The quantity purchased is determined by the quantity needed to bring the inventory to its maximum stocking level.
Build from open order brining quantities up to maximum: Creates PO(s) for items on open orders and brings stocking levels to their maximum. The quantity purchased is determined by adding the Total Quantity needed for orders to the Total Quantity needed to restore the stocking levels to its maximum.
Build from open order (ignore current stocking quantities): Creates PO(s) for items on open orders and ignores the current quantity on hand. The quantity purchased is determined by the Total Quantity needed from the open orders.
Build from inventory max/min levels only (exclude reserved): Creates PO(s) for items that are below their minimum stocking level. The quantity purchased is determined by the quantity needed to bring the inventory to its maximum stocking level.
Build for a single order: Creates PO(s) for items on the specific order. The quantity purchased is determined by the quantity requested on the order.
Select the warehouse(s) to purchase items for
If using "Build for a single order", select/enter the specific OrderNo
Select Department, Order Status, and/or From and Thru Date Required information, if desired.
Step 2: Build Purchase List

(Optional) Default Buy to Yes: When checked, this sets the buy option to "Yes" for all items that have a default vendor (set on page 2 of the item master ).
(Optional) Ignore Item Exclusion Rules - When left unchecked, items marked as "Exclude from Auto Purchase" will be excluded. If checked, these items will appear in the auto purchase grid. The Exclude from Auto Purchase is a hidden field in the item file. If you want to exclude particular items from the Auto Purchase process, please contact ServMan Support.

The following information is shown:
Buy: All items will be No by default unless you have checked the Default Buy to YES option and the item has a default vendor
VendorID: The vendor the item will be purchased from
Item: Your ServMan item ID
Qty: Quantity to be purchased
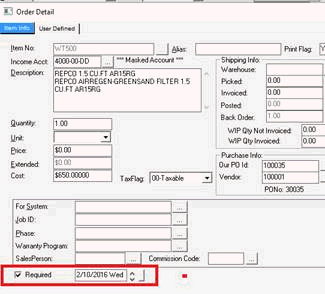
OrderBy: Indicates the date the purchase order needs to be placed by to receive the item by the required date given on the work/sales order it is needed for. Calculated by using the required date on work order and the lead time needed from page 2 of the item master .
RequiredBy: The required date given on the work order (only applicable for items purchased for work/sales orders)
Description: Description for the item; comes from the item master
DropShip: Indicates if the item should be drop shipped
OrderNo: The work/sales order the item is needed for (only applicable for items purchased for work/sales orders)
OnHand: The current quantity on hand in the specified warehouse
Avail: The current quantity available (on hand - reserved) in the specified warehouse
OnOrd: The current quantity on open purchase orders
MinMax: The minimum and maximum stock level for the item in the specified warehouse
Name: The name of the client from the work/sales order
Review the purchase list and adjust the items as needed. You can adjust the columns highlighted in blue (Buy, VendorID, and Quantity) on each line.
Step 3: Save or Create
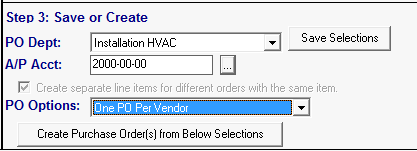
PO Dept: Select the department to appear on the purchase order
A/P Acct: Select the Accounts Payable account
Create separate line items for different orders with the same item: By default this checkbox is checked and grayed out, as most system configurations require this. Contact Support if you wish to change this setting.
PO options: Select the appropriate option
One PO Per Vendor: Creates a single PO for each Vendor
One PO Per Vendor Per Warehouse: Creates a single PO for each Vendor and each warehouse individually
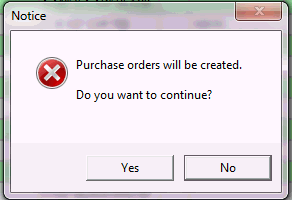
Click the "Create Purchase Order(s) from Below Selections" button
If ServMan encounters a BUY of Yes with no VendorID, you will receive an error message with the item number so you can fix it.
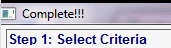
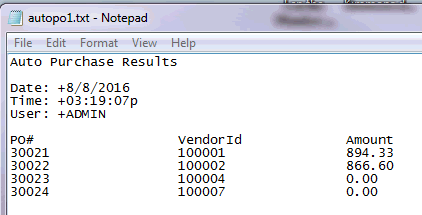
Complete!!! will appear in the upper left corner, when the process has finished.
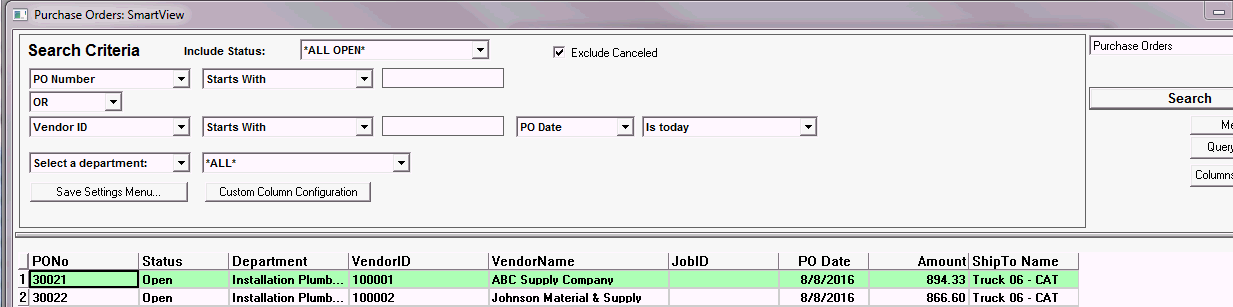
You can now close the screen and review your purchase orders.
NOTE: If you run this process the same way a majority of the time, ServMan can save a default purchasing option that can be overridden if a different method needs to be used under certain circumstances. Contact Support@ServMan.com for assistance with these settings.
Enter the information below into ServMan's INI file:
[PURCHASE ORDERS]
AUTO_PO_OPTION1=0
The highlighted digit above tells ServMan which of the options is the default for you company
The options are:
0 - Build from Open Orders Only - This is the default setting
1 - Build from inventory min/max levels only
2 - Build from Open Orders bringing quantities up to maximum
3 - Build from Open Orders (Ignore Current Stocking Quantities)
4 - Build from inventory min/max levels only (Exclude Reserved)
5 - Build for a Single Order
To take full advantage of Auto Purchase, you should set the maximum and minimum stock levels on all stock items for each warehouse. You may also want to set the default vendor on these items as Auto Purchase automatically uses the default vendor when generating the purchase list.
NOTE: The Auto Create Purchase Order program looks first at the Required Date on the order detail record. The user can assign that date by pressing the long post button on the detail line, then checking the Required checkbox.
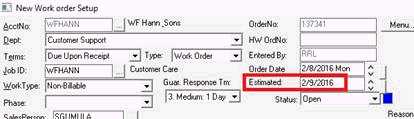
If that required date is blank. then the program will use the Estimated Date at the top of the Order Setup screen.
See Also: Replenish Main Warehouse Stock