Gauge Customer satisfaction and loyalty through our integration with SurveyMonkey, a company that provides customizable surveys and data analysis tools. By using SurveyMonkey’s Net Promoter Score (NPS) questions in your surveys, you can easily compare your NPS with other companies' scores within your industry. Research has shown that the Net Promoter Score acts as a leading indicator of company growth through its straightforward, proven metric that predicts growth with an action-oriented management philosophy to keep your organization focused on what matters and what works.
For example, if your organization’s NPS is higher than those of your competitors, you will likely outperform the market, and managing your organization to improve its NPS will improve your business performance. Whether you are aiming for faster growth or increased profits, use NPS as the foundation of a measurement framework that is tightly tied to the customer journey.
1. Install and configure the ServMan APPAA and Survey modules
2. Create an account in SurveyMonkey and build your surveys
3. Create a Key within SurveyMonkey to connect directly with ServMan
4. Enter that key and your survey name in ServMan
5. Tell ServMan when to send the surveys based upon a flip to a predefined order status code
6. Collect your results and take action
Contact your ServMan representative for more information about this step.
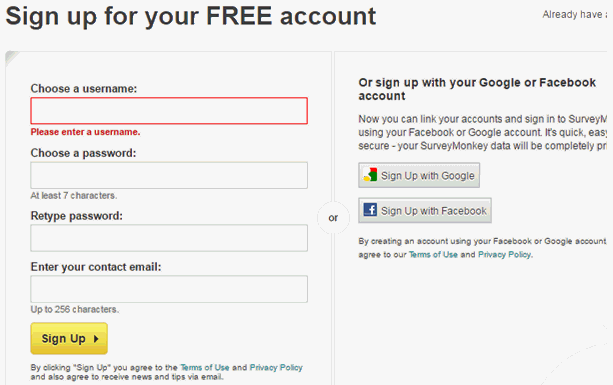
Create an account through SurveyMonkey.com. You may use a free account to initially set up your survey, but you are very limited and will be required to create a paid account within 90 days.
IMPORTANT NOTE -
The minimum requirement for integration with ServMan is the SurveyMonkey Gold level.
The highest level of service, currently the Platinum level, is required to have the ability to send the client to a landing page (either a web page that you create or one that you specifically designate) to leave a review.
With this highest level of service you also receive their phone support. They will help you with how to direct people to the web page of your choice.
Note that each survey can have a different landing page and directing them to that landing page can be based upon their responses to the questions asked in the survey.
See the SurveyMonkey website for Upgrade Plans and Pricing.

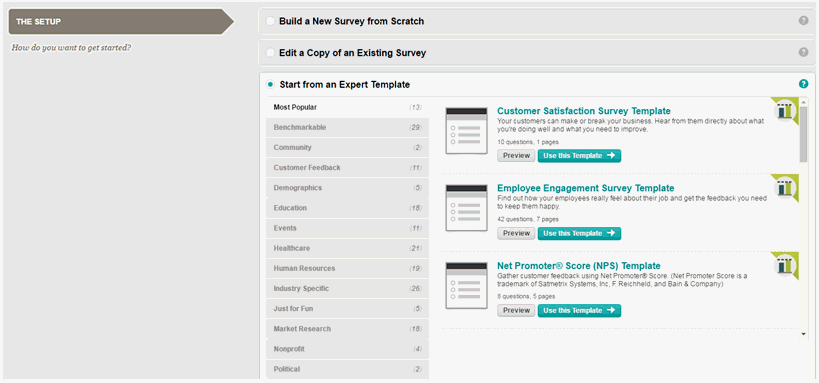
Follow the instructions in SurveyMonkey to create your survey. You have the option to build your survey from scratch or begin from a preexisting template.
For this example, I will select the Net Promoter Score (NPS) Template to build my survey. Press Use this Template to continue.
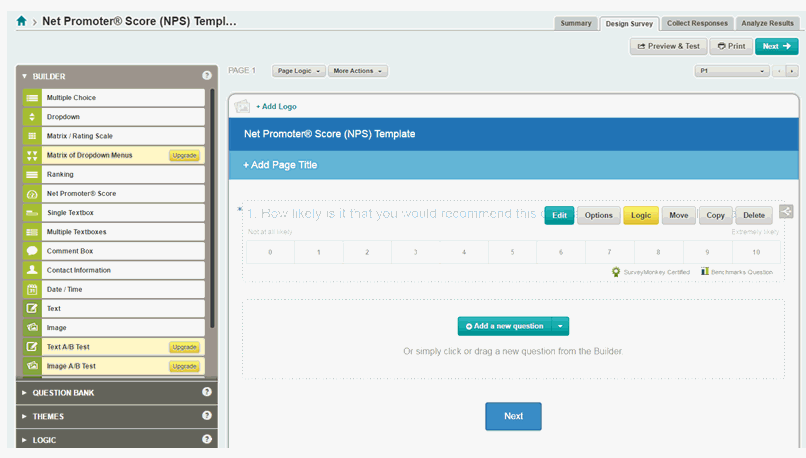
Use SurveyMonkey’s tools to add your logo, change the name of the survey, add, modify, or delete questions, paginate, require answers, etc. A paid account is required for many of these options.
Preexisting questions from a template or questions from the Question Bank can be customized with the information that appears in the dropdown shown below.
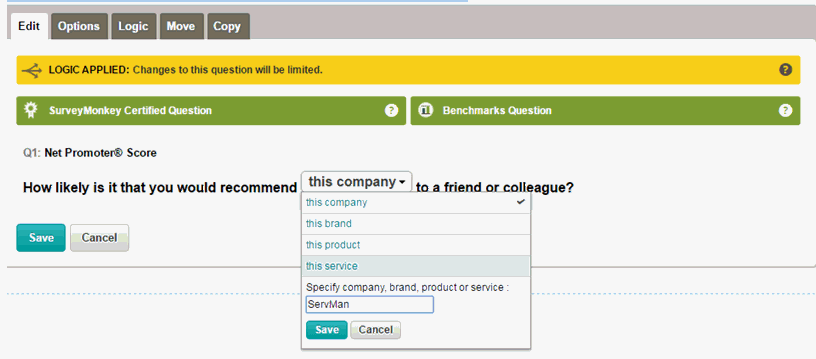
Should you choose to further change a Benchmark or Certified survey question, SurveyMonkey will alert you that changing the wording may add bias and create accuracy issues. It is best to not reword those questions to gain an accurate comparison to others within your industry.
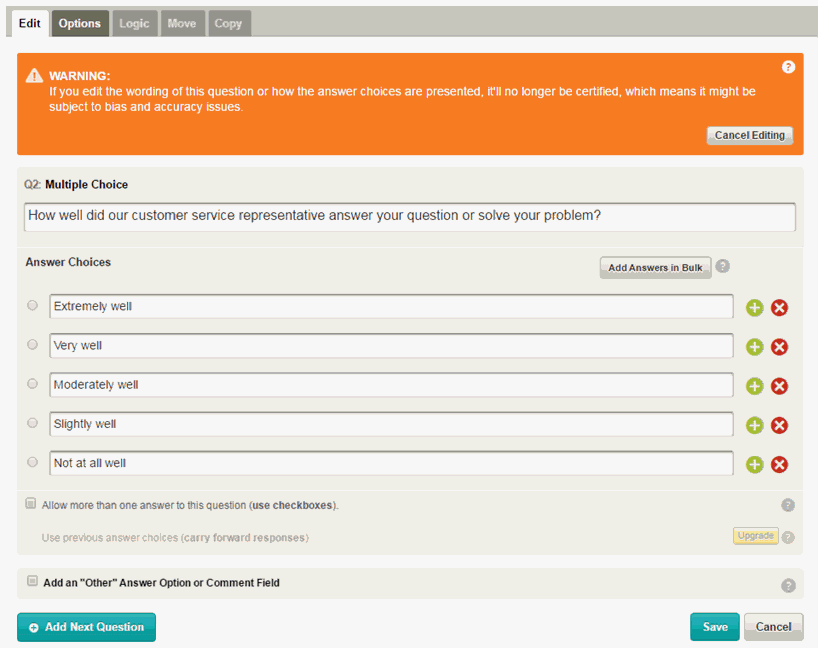
Once your survey is complete, press the Preview and Test button, at the top of the page. This will allow you to view the survey from your client’s perspective. Note - You may actually take the survey at this stage without affecting your end results.
Once you are satisfied with your survey, press the Next button.
Click on the “Get Web Link” box to collect your survey responses via a web link.
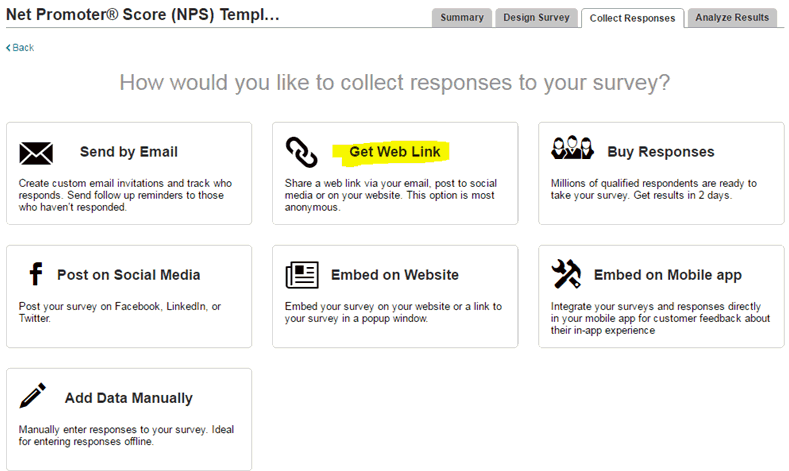
This brings you to the web link screen where your responses will be stored for analytical purposes within SurveyMonkey.
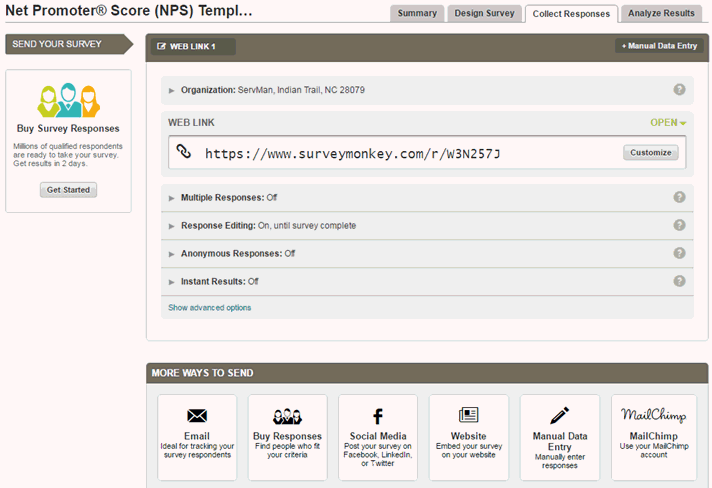
Once your survey and response collection method is set, click on the word “Developers” at the very bottom of the screen.

Click on the “My Apps” tab at the top of the Developer page and then press the green Add New APP button.

Enter a name for your App. This name will be used to identify your account at SurveyMonkey. Press Create App.

Click on Settings on the left side of the screen. This will display additional information about your account.
The name of your App will appear in the Display Name field.
Leave the OAuth Redirect URL as it is.

Leave the Status set to Draft until you are completed with setup and testing.

In the Scopes section; click on the lock symbol to unlock the specified scope as shown below. Scopes that have the circle with a slash through it should be double clicked to get them into the unlocked position.
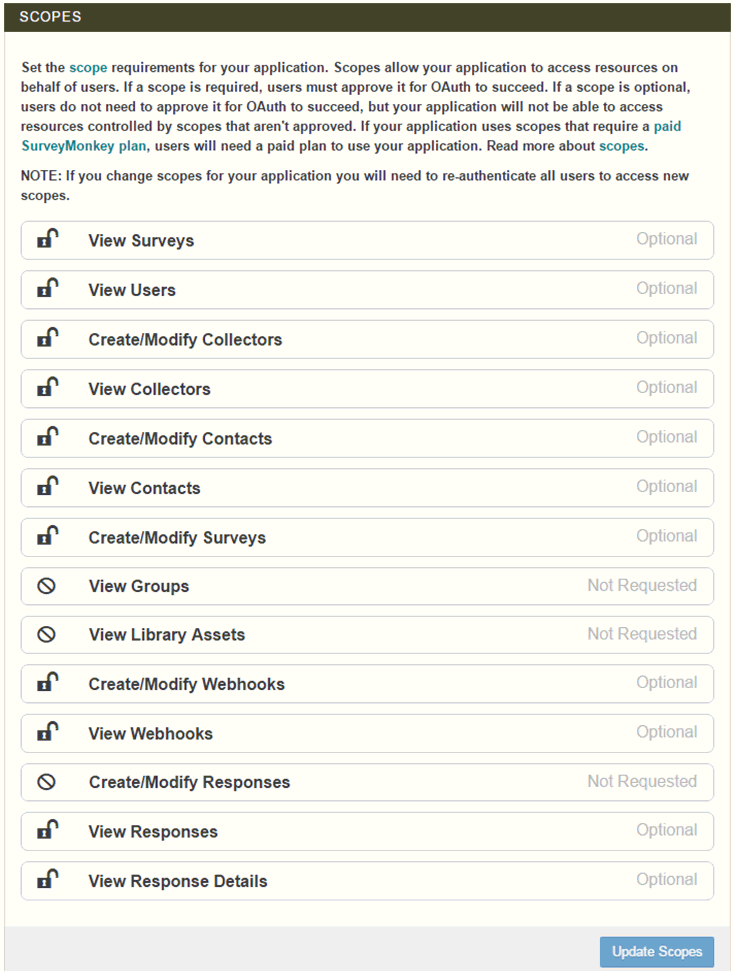
Press Update Scopes to receive a new access token.

Scroll down to the bottom of the screen to view the Credentials section. Here you will find the information needed to connect to ServMan.
Keep this screen open so you can easily copy and paste the information into ServMan.
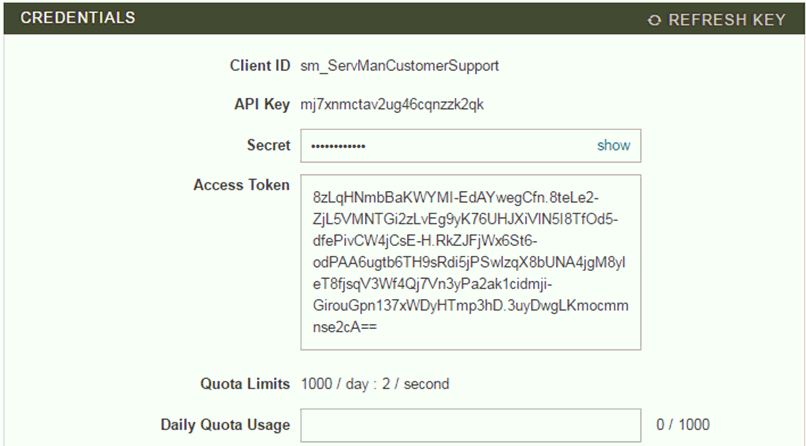
In ServMan, navigate to Tasks-> System Procedures-> Survey -> Survey Settings.
Click on the SurveyMonkey tab
Copy the API Key from SurveyMonkey and paste it into the Key field on the ServMan screen.
Copy the Token from SurveyMonkey and paste it into the Token field on the ServMan screen.
All of your branch and departments are listed in 2 grids. The top grid is used to send surveys based upon branch only. The bottom grid allows you to send surveys based upon the branch/department combination.
Enter the survey name, exactly as it appears in SurveyMonkey. (Note – this is not the SurveyMonkey Developer App name, this is the name you gave the actual survey when it was created.)
Press the Refresh button next to the grid. This instructs ServMan to go out and grab the URLs created for this survey.
Double clicking the Survey URL will open the live survey in a web browser. (Caution: Do not answer questions in your survey when opened from inside ServMan!)
Double clicking the Survey Response URL will open the survey analysis page for this survey. Here you will view composite and individual results from your survey.
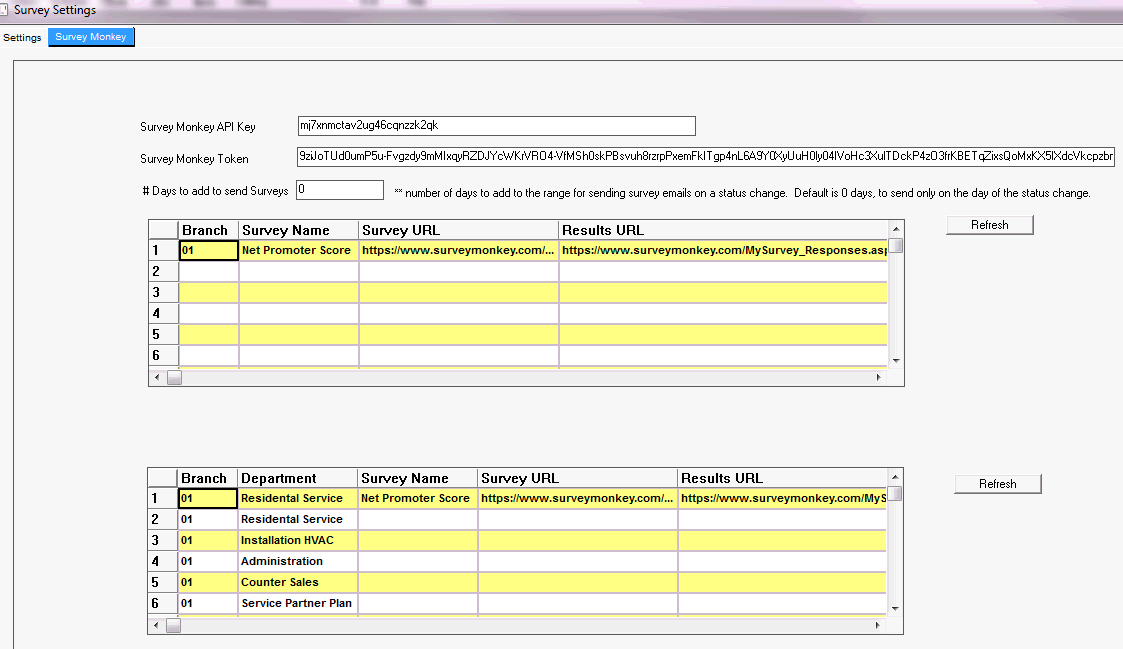
# Days to add to send Survey – The default is set to zero meaning that surveys will be sent to clients the same day the order or job was flipped to the status code set to receive surveys. Changing this number to 1 will tell ServMan to wait one day and send the survey one day after the work was completed.
Tasks -> System Procedures -> APPAA(07) -> Call Settings
Top section -
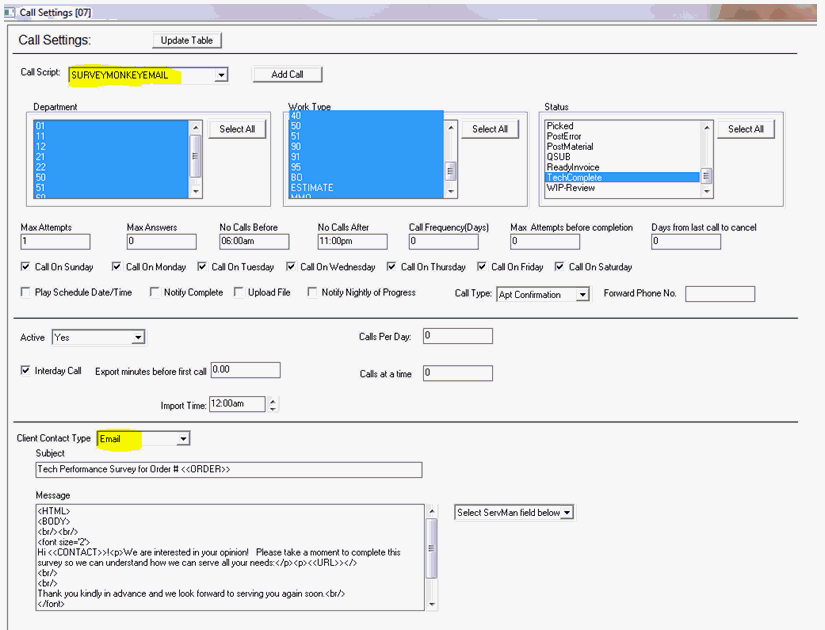
Add Call button - Create a Call Script named SURVEYMONKEYEMAIL – all caps, no spaces
Department and Work Type selection criteria are for future use.
Status – select only the status code that you want to trigger sending your survey. For example: If you select Tech Complete as the trigger, surveys will be emailed to the client after the order has been set to Tech Complete. NOTE: If the order is reopened and reset to Tech Complete, ServMan will not send out a second survey.

Second section -
- Defines when the emails will be allowed to be sent from APPAA
Max Attempts – defines how many times APPAA will attempt to send the email. Set this to 1.
Max Answers – Set this to 0.
No Calls Before and No Calls After – Used for the time frame APPAA will send the email survey
Call On days – check each day you want APPAA to send emails. These fields work in conjunction with the SurveyMonkey Survey screen defining how many days after the status flip you want to send the email. If you uncheck Call On Sunday, and the work was completed on Saturday, APPAA will send the email survey on Monday.
The remaining fields in this section are not used in the SurveyMonkey module.

Third section -
Set as shown below with Active set to Yes, Interday Call checked and Import Time set to 12:00am.

Bottom Section -
- Defines the subject line and body of the actual email that will be sent to your client.
Client Contact Type – set this to Email
Subject – Enter the subject line of the email. Reference the order number as <<ORDER>>
Message - Enter the body of the email as shown below.
Select ServMan field below is for future use.
When the APPAA email configuration is completely set up, it should look like the image below.
Tasks -> System Procedures -> Survey -> Survey Create of Edit
This is View Only for SurveyMonkey surveys. To make changes to your survey, you must do so from SurveyMonkey’s website.
As explained above, creating test responses on a survey when launched from within ServMan will result in Positive and Negative results populating this screen. To properly test the Survey, you must do so from SurveyMonkey’s website. Simply accessing the Survey from within ServMan is fine; however, answering survey questions from within ServMan will alter your results as shown here.

Open the client record and select the survey tab
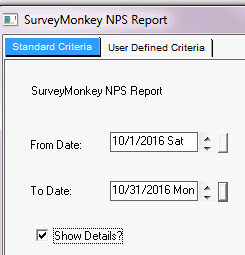
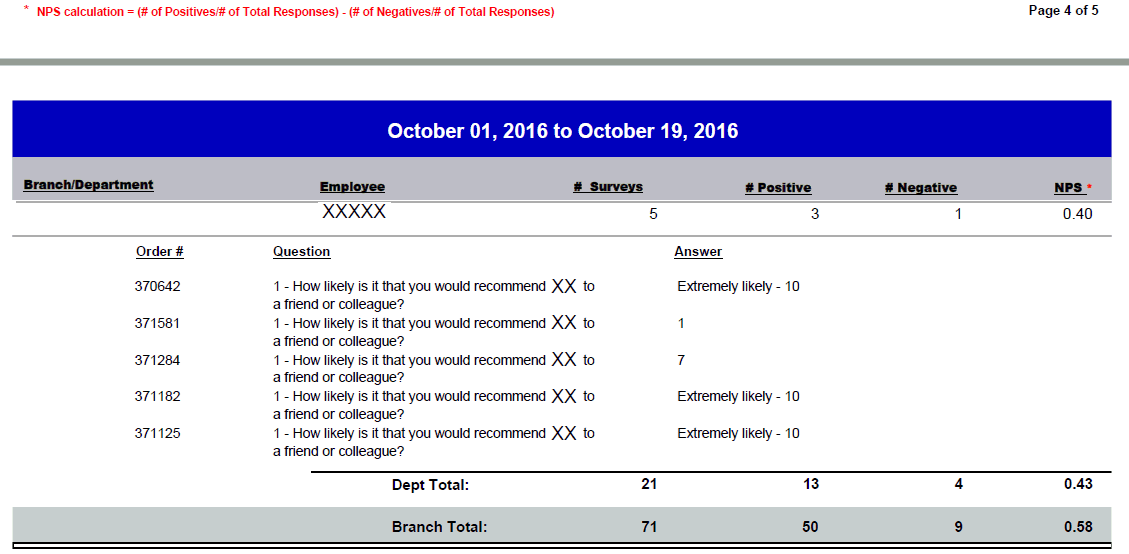
The generated report will show all surveys with at least 1 answer for each employee. Employee totals are above the detailed questions/answers. Hide Detail will hide the individual answers, showing each employee's totals and the final Department and branch totals.
Note: The NPS Calculation is based upon the number of positive responses (9 or 10) divided by the total responses MINUS the number of negative responses ( 1 - 6) divided by the total responses. Neutral responses (7 or8) are only counted in the total responses. In the image below Employee XXXXX had 5 responses, three were 10s, one was a 1 and one was a 7. The calculation then is (3/5) - (1/5) for a total NPS of .40 for that tech.

This report will show you the Account Name and Number, and the Date the survey was completed
The Link Type tells you where the survey was generated from (order, client, job) while the Link To gives you the appropriate reference number it is tied to (Client, Order or Job number)
Contact refers to who completed the survey
Complete tells you if all answers were completed or if some were left unanswered
The User is who sent the survey to the client
Score equals the numeric answer to the scale type question
Checking the Hide Details checkbox will hide all the accounts and show just the four lines of summary information


This report will show all SurveyMonkey and Meet Your Tech profiles that did NOT get sent from ServMan with the reason why.
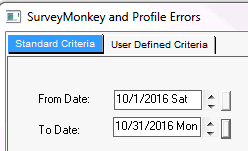
The report with display the company name and account number, the order number and employee who sent the text/email, the reason for the failure and the date and time of the error
In the example below, a text message was not sent to Martin Jeffers because he did not have a phone number listed.
Chris Borland did not receive an emailed Survey because of a missing Contact email address.
Deborah Montgomery did not receive a Meet Your Tech email because the tech, 1DRAINS did not have a valid profile created.

