Departments
Departments are used to categorize income and people within your business. For example, you have a HVAC company that performs new installations with builders and performs residential services and service calls. You may want to view your revenues on your income statement by these same categories. To accomplish this you would create a Construction and a Residential department. You would then set up corresponding general ledger codes for tracking the sales. ServMan will require you to place a department code on every work order or invoice that you create. You will be able to view them, sort, organize and schedule your work using this information. You will additionally be able to print your financial statements showing the revenue based on the departments you’ve created.
Add a department
- Click Departments on the General Ledger Navigator or select Master Files > Miscellaneous > Departments File.
- Click New Dept.
- Enter the requested information.
- Click OK.
back to top
Edit a department
- Click Departments on the General Ledger Navigator or select Master Files > Miscellaneous > Departments File.
- Select the department.
- Click Edit Dept.
- Update the information as needed.
- Click OK.
back to top
Relating work types and order status codes to specific departments
You may have specific work types and order status codes that are applicable to a specific department. Using the setting on the Advanced tab of the department setup, you can establish these relationship. By default, all work types and order status codes apply to all departments. When specific work types and order status codes are supported, only those will be visible on work orders, quotes, and invoices assigned that department.
- Click Departments on the General Ledger Navigator or select Master Files > Miscellaneous > Departments File.
- Select the department.
- Click Edit Dept.
- Select the Advanced tab.
- Uncheck the "All work types are supported" option.
- Move the work types applicable to the department to the supported column.
- Uncheck the and "All status codes are supported" option.
- Move the orders status codes applicable to the department to the supported column.
- Click OK.
back to top
Delete a department
- Click Departments on the General Ledger Navigator or select Master Files > Miscellaneous > Departments File.
- Select the department.
- Click Delete Dept.
- Click Yes to confirm.
back to top
Department Options and field definitions
General tab
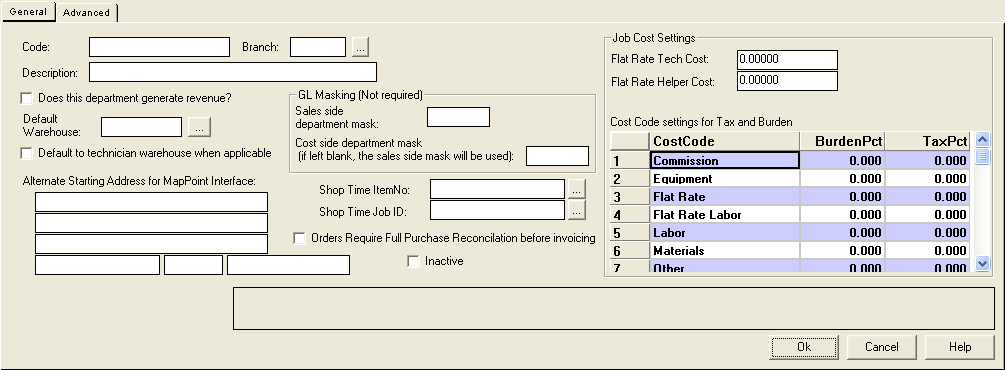
- Code: unique identification code for the department
- Branch: branch associated with the department; if you have a service department in two (2) branches, you should setup a department for each branch
- Description: description of the department; this is displayed on orders, quotes, invoices, purchase orders, bills, and other department menus
- Does this department generate revenue?: this option must be checked if the department is to be used on orders, quotes, and invoices
- Default Warehouse: sets the default warehouse if inventory is typically pulled from one warehouse
- Default to technician warehouse when applicable: uses the warehouse associated with the technician scheduled to the order
- Sales side department mask: general ledger masking code for this department for sales (income)
- Cost side department mask: general ledger masking code for this department for cost (expense or cost of sales)
- Alternate starting address for MapPoint Interface: provides an alternate starting address for orders in this department when using MapPoint
- Shop Time ItemNo: item to uses for logging shop time
- Shop Time Job ID: job to uses when logging shop time
- Orders Require Full Purchase Reconciliation before invoicing: when enabled (checked), requires purchases that are linked to specific orders be, received or canceled before the invoices can be posted
- Inactive: inactivates the department; this prevents it from being set on orders, invoices, and other documents
- Job Cost Settings: these settings allow you specify the cost for technicians and helpers for flat rate items as well as burden and tax percentages by cost code; these settings are only used in job cost reporting and have not impact on your financial reports
Advanced tab
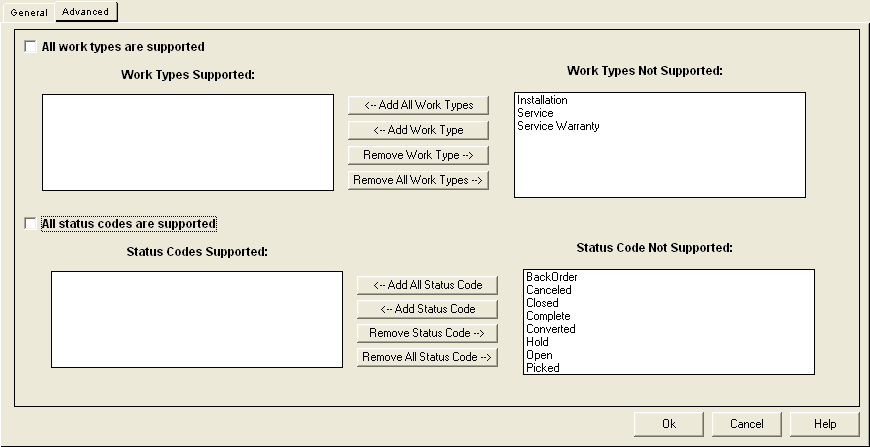
This tab shows which work types and status codes are applicable to this department. You can use the add and remove work type and order status code buttons to add or remove them from those supported by the department.